Beauty tip for Women: Halloween Nail Art 3

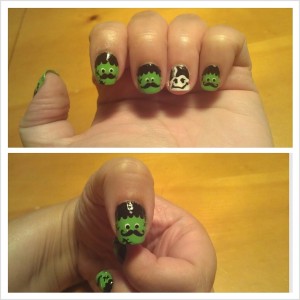
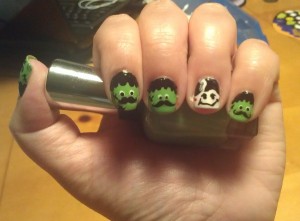
For my third Halloween nail art manicure I wanted to try out Frankenstein and the Bride of Frankenstein.  I have to say that the idea of doing freehand nail art scares me.  I’m simply not good at it and enjoy stamping better.  But I decided I wanted to challenge myself.  I also wanted to combine the mustache crazy in the manicure.  I love those mustaches.

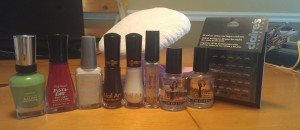
Here is what I used to create what I call “Meet Mr. Frankenstache and his Bride”:

  • Sally Hansen – Parrot
  • Sally Hansen – Rapid Red
  • Wet n’ Wild – French White Crème
  • Milani Nail Art Precision Brush – Black & White
  • Nailene Stripe Fx – Silver
  • Sech Vite – Base Coat
  • Sech Vite – Dry Fast Top Coat
  • Dotting Tools
  • Claire’s mustache nail art stickers

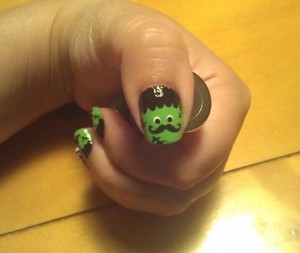
I started off with two coats of Parrot on all my nails expect the ring finger.  On the ring finger I did two coats of French White Crème.  I then did an outline of their hair using the Milani Black and with this same black dotted in the hairline/bangs.  Used Milani Black to make the lips and eyes on the Bride. Using Rapid Red I gave her cheeks some color.  I used Milani White to make the white hair strand on her head and Nailene Silver for the other strand on her hair.  For Mr. Frankenstache I dotted the eyes with Milani White then Black.  Made the stitch marks using the Milani Black.  It is hard to tell but I did add some of the Nailene Silver to the sides to make the bolts.  I then added the mustaches.


Beauty tips for Women: Halloween Nail Art 2

Here is my second Halloween nail art manicure.  My girls have been going crazy asking for candy corn and I finally purchased some.  This was inspiration for my festive candy corn Halloween nail art manicure.

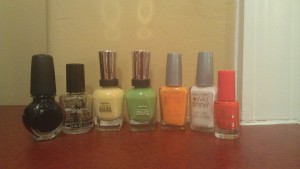
Here is a picture of the polishes I used for the manicure:

Konad Special Polish – Black
Seche Vite – Dry Fast Top Coat
Sally Hansen – Yellow Kitty
Sally Hansen – Parrot
Wet n’ Wild – Sunny Side
Wet n’ Wild – French White Crème
Essence – Wake Up
Color Club – Clear Coat

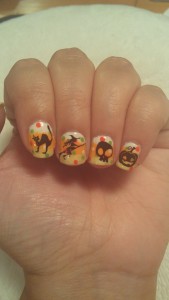
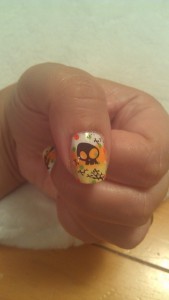
I started off by doing a gradient using the French White Crème, Sunny Side and Yellow Kitty.  I did three coats of the gradient because the yellow and orange colors where just two light and I wanted it a bit more richer in color.  Once I got the colors the way I wanted, I applied a clear coat to blend the colors.  I waited for it to dry then started applying random dots in Parrot, Wake Up, and French White Crème.  Once that dried up, I thought some stamping would be cute.  I used Bundle Monster – BM225 Skull image on the thumb.  The cat and witch used on the index and middle finger are from Shany – SH02.  The ring finger skull is Bundle Monster – BM211 and pinky finger is Bundle Monster – BM222.  Topped everything off with Sech Vite.

Here are the pictures of my festive candy corn Halloween manicure:


Beauty Tips for Women: Halloween Nail Art

This is my first every attempt at Halloween nail art.  I don’t particularly like scary Halloween stuff and neither does my little girls; so I opted to do something a little cutesy and spooky.

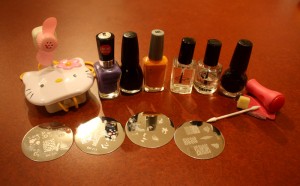
Here is a picture of all the items used to get the manicure going:
Wet n’ Wild – On a Trip (213C)
Wet n’ Wild – Sunny Side Up ( 405)
Sinful Colors – Black on Black
Color Club – Clear Coat
Seche Vite – Base Coat (not in pic)
Seche Vite – Dry Fast Top Coat
Konad Special Polish – Black
Konad Special Polish – White (not in pic)
Milani Nail Art Precision Brush – Black (not in pic)
Bundle Monster Plates: BM13, BM213, BM223, BM224
Q-Tip
Makeup sponge

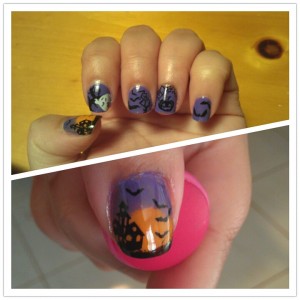
The thumb background was created using the gradient effect.  I started off with Seche Vite – Base Coat (forgot to place it in the picture).  Then applied one coat of Sunny Side Up.  Using the make up sponge (cut to a small size) I applied On a Trip and began to sponge from the top of the nail down and beginning to shape the sunset.  I let it dry a little before I sponged on Sunny Side up to define the sunset area more.  Waited for that to dry a bit before sponging on Black on Black on the tip of my nail.  I applied the clear coat which smoothes the colors into each other.  Once dry I stamped with Konad – Black the house image from BM224 and used the bats image from BM213.  I haven’t mastered the art of cleaning up the edges of my nails, so pardon the mess but I’m no professional.  I gave it a coat of Seche Vite and wala!

The rest of my fingers got a base coat and two coats of On a Trip.  On the index finger I tried a freehand tree using Milani nail art black.  Then stamped using Konad – White the ghost image from BM223.  The middle finger was stamped with Konad – Black using BM213 bats image and part of the pumpkin image of BM224.  Ringer finger was stamped with Konad – Black using BM224 pumpkin image. Lastly the ring finger was stamped with Konad – Black using BM13 bats image.  All received a nice coat of Seche Vite.