Beauty Tips for Women: Smitten Polish – Winter is Coming

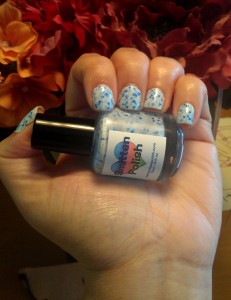
Smitten Polish has a wonderful duo set based on the Game of Thrones. I had been patiently waiting for Smitten Polish to restock her Esty store to buy Winter is Coming.

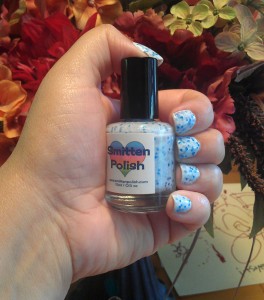
Let me start off by saying that I’m a fan of Game of Thrones and have read all the books thus far. Winter is Coming is the motto of the Stark House. Winter is Coming is a semi-sheer milky white base polish with blue glitters. It screams winter to me but it reminds me of so much more, like Jon Snow (Game of Thrones character belonging to the House of Stark), White Walkers (aka the Others in Game of Thrones), or a beautiful snow blizzard. Well enough of my musings. The formula was amazing. I did a base coat of white and then added two coats.

I was mesmerized by the combination of the tiny shavings of blue then how the bigger blue glitter would just make it all pop. When I use Winter is Coming next I will skip the white base coat. I have seen swatches without the white base coat and it looks even more amazing. So if you have a Game of Thrones fan that happens to be into polish, this is a definite most. If you like the Game of Thrones duo set, check out Smitten Polish’s Wicked, Tricksy, Flase, which is a line Gollum delivers in the Lord of the Rings. This polish is on my wish list. Do I need to add that I’m super J.R.R. Tolkien fan. So if you are a Tolkien fan or Lord of the Rings fan that loves nail polish, this is a most have too. So check out Smitten Polish on Etsy: http://www.etsy.com/shop/SmittenPolish and on facebook: https://www.facebook.com/SmittenPolish

I give Winter is Coming, 5 brains!

Beauty Tips for Women – Sally Hansen Parrot

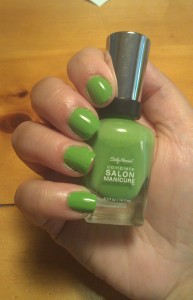
I wanted share a beauty product review on Sally Hansen Complete Salon Manicure in the color Parrot. I had been searching for a green color to do some Halloween themed nail art when I came across Parrot at Bealls on discount.

Sally Hansen Parrot is wonderful lime green. It is wonderful cream formula that went on smooth with no streaks. My only issue with it is the brush. I just can’t get used to the flat brushes. Here is a bottle shot of the item. The camera really just doesn’t do it justice.

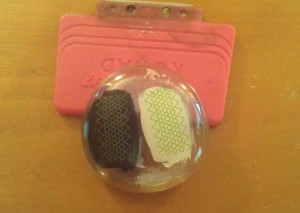
I decided to test out Sally Hansen Parrot on its stamping abilities. I picked plate BM210 from Bundle Monster. As you can tell from the shot it did very well on both black and white backgrounds. I was pleasantly surprised.

Overall I give this product 4 brains!

Homemade Halloween Costumes for Kids: Custom T-Shirt

I recently posted up an article on making homemade Halloween costumes for kids and this is the second part to that article.  So my youngest is set with her Mickey Pirate costume for Halloween.  The question still remained, what would my 6 year old daughter be.  She decided this year that she did not want a homemade Halloween costume but rather a store purchased one.

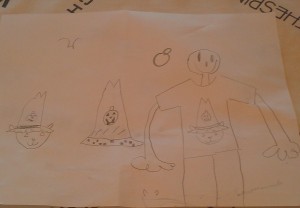
However, this week she changed her mind by telling me that she still wanted a homemade Halloween costume, well sort of, she wanted a homemade Halloween t-shirt … lol … then she hands me her sketch for the homemade Halloween t-shirt.  Here is a picture of her sketch.


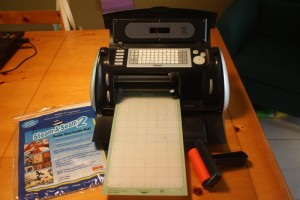
So my job was to turn this sketch into reality.  Thankfully last year I had picked up an orange t-shirt on clearance at Michaels for $1.  Although, the only problem is the size of the t-shirt, an adult size small; so that meant I would have to re-size the t-shirt to fit her.  So here are the tools I used:  my computer, Cricut Create, a Cricut mat, Sure Cuts A Lot 2 software, a brayer, Steam-A-Seam 2, Fray Check, one orange t-shirt and black fabric.

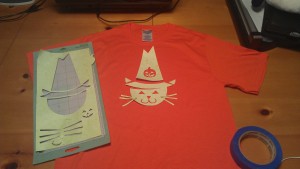
Once we settled on the design for the “Halloween Cat Witch” t-shirt, I did a test cut using paper to see how it looked and fit on the t-shirt.  I then placed the Steam-A-Seam onto the black fabric and the used the Cricut Create and Sure Cuts A Lot software to cut the images out.


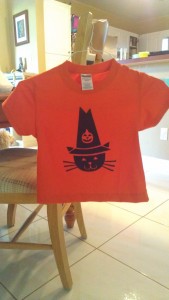
I then ironed the images onto the t-shirt.  I applied the Fray Check to the cut out so that the design will not fray when washed.  Here is what it looked like as the adult size small.

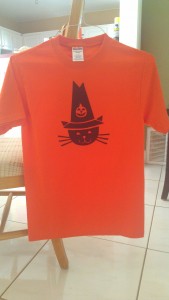
The next step was to re-size the t-shirt.  Basically it involved taking the t-shirt apart and cutting away the excess fabric and sewing it together again.

The final result is one homemade Halloween kids t-shirt, the “Halloween Cat Witch”.  I’m so proud of her for designing it.