Homemade Halloween Costumes for Kids: Mickey Mouse Pirate

Although this site is mainly devoted to beauty tips for women on occasion I like to share some other stuff I’m into like sewing.  I’m very much a beginner at sewing; so this is no project runway type stuff.

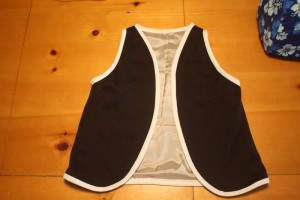
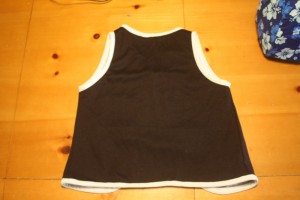
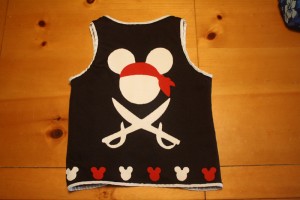
My youngest, 3, wants to be a pirate.  You think no problem with that, except she wants to be a Mickey Mouse Pirate.  I can’t just step into the Disney Store and pick one up.  They do have some Pirates of the Caribbean costumes but they are mainly for boys and they don’t have Mickey Mouse on them.  She wants Mickey Mouse all over this costume.  So this would have to be a homemade Halloween costume.  I couldn’t find a vest, so one had to be made.  Here is a front and back picture.  A simple vest nothing crazy.
 

I then need to create the images that I would use for the vest.  Below is a picture of what I used: my computer, Cricut Create, a Cricut mat, Sure Cuts A Lot 2 software, a brayer, Steam-A-Seam 2, Fray Check, and white and red fabric.
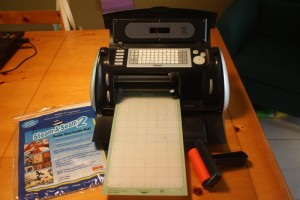
 

Once I created my images on the computer, I ironed on the Steam-A-Seam to the pieces of white and red fabric.  Used the Cricut Create and Sure Cuts A Lot 2 to cut out the images.
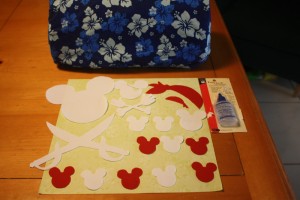
 

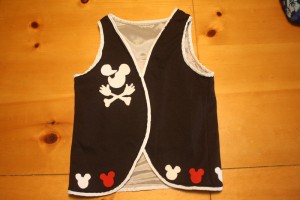
I then ironed on the images to the vest to create the Mickey Mouse Pirate look. I applied Fray Check so that the images would not fray.
 

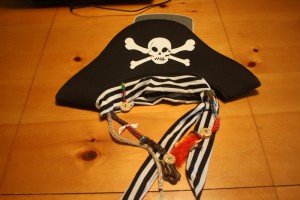
The pirate hat was a bit trickier.  I picked up the hat at Clarie’s.  This is what it looked like before the full transformation into the Mickey Mouse Pirate hat.  I wanted to give it the Jack Sparrow feel by adding some dangly things to it and I would have loved to try my hand at dreadlocks but I don’t have the time for that.  So yarn pieces braided up was the best I could do.
 

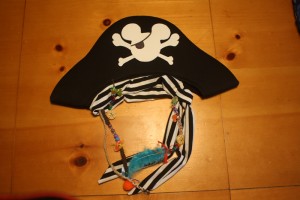
I still needed to get Mickey on the pirate hat.  The idea I came up with was to cut Mickey Pirate out of a foam sheet and sew him onto the hat.  I couldn’t use fabric because it didn’t cover up the skull, it was too transparent.  The foam sheet cut out worked like a charm.
 

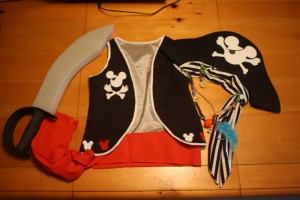
Here is the Mickey Mouse Pirate or as she says the Mickey Pirate costume for Halloween this year.  I picked up the sword at Target and the sash was made from red fabric.  So to complete the outfit she will have on a white t-shirt and black pants.    Now if only I had time to make myself one too but I have to work on my oldest daughter’s costume.
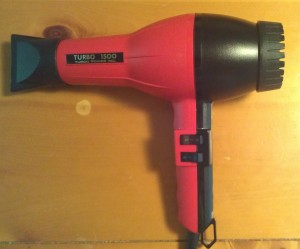
Beauty tips for Women: Blow drying your hair using Turbo Power’s Turbo 1500

Of all the beauty tips for hair that I have heard and practiced, the one that is the most important to me is the investment in a good blow dryer.  I’m not a professional hairdresser, beautician, hair stylist or nail technician but I do enjoy dabbling in those areas.  I host what I like to call Blow Drying parties.  I mainly do friends and families hair Fridays for the weekend or Sundays to start off the workweek.  So I need a reliable blow dryer that will get the job done.

Here is a picture of my trusty blow dryer made by Turbo Power Inc. – Turbo 1500.  I purchased this blow dryer in 2001, so that is 11 years with the same blow dryer.  The Turbo 1500 has never broken down on me.  Granted I do clean it and take care not to mangle the cord.  This Turbo 1500 is a professional stylist blow dryer made in Italy.

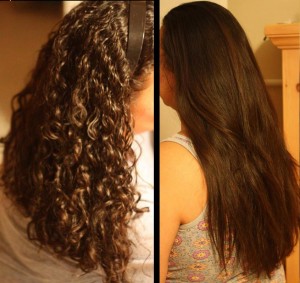
Until I had purchased this 11 years ago, I would go through blow dryers like water.  I have curly hair and can blow dry my hair straight without any issues using this blow dryer.  Here is a picture of my hair curly then blown dry straight with the Turbo 1500.

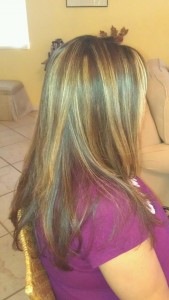
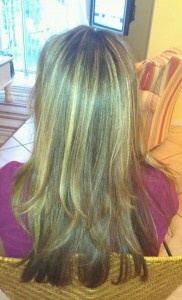
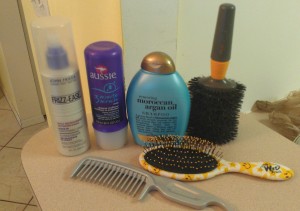
Here is a picture of a blow dry I did over the weekend along with the products I used.  I totally forgot to take a picture of her hair before hand.  The hair care products are Organix Moroccan Argan Oil Shampoo, Aussie 3 Minute Miracle, John Frieda’s Frizz-Ease Leave In Conditioner.  As you can tell she has highlights that look awesome but all the dying has dried out her hair.  The combination of products used gave her hair a lot hydration and conditioning, which she needed.  I used my trusty Wet Brush to detangle her hair and an oval shaped brush from Goody – Get Smooth Volume Natural Shine Boar Bristles (Review coming) to dry her hair.

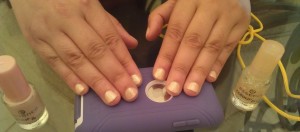
To finish everything off I did a simple manicure that goes with everything using Essence Modern Romance and Space Queen over it.

If you are looking for a blow dryer I strongly recommend a blow dryer made by Turbo Power Inc.  Mine is an oldie but goody and is still working great after 11 years.  So you can imagine what the newest ones can do.


I give Turbo Power 5 brains and recommend you to get more information from this site.

Beauty Tips for Women: Halloween Nail Art

This is my first every attempt at Halloween nail art.  I don’t particularly like scary Halloween stuff and neither does my little girls; so I opted to do something a little cutesy and spooky.

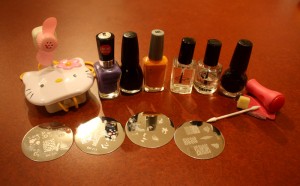
Here is a picture of all the items used to get the manicure going:
Wet n’ Wild – On a Trip (213C)
Wet n’ Wild – Sunny Side Up ( 405)
Sinful Colors – Black on Black
Color Club – Clear Coat
Seche Vite – Base Coat (not in pic)
Seche Vite – Dry Fast Top Coat
Konad Special Polish – Black
Konad Special Polish – White (not in pic)
Milani Nail Art Precision Brush – Black (not in pic)
Bundle Monster Plates: BM13, BM213, BM223, BM224
Q-Tip
Makeup sponge

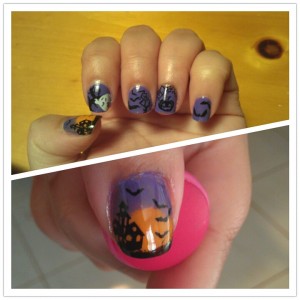
The thumb background was created using the gradient effect.  I started off with Seche Vite – Base Coat (forgot to place it in the picture).  Then applied one coat of Sunny Side Up.  Using the make up sponge (cut to a small size) I applied On a Trip and began to sponge from the top of the nail down and beginning to shape the sunset.  I let it dry a little before I sponged on Sunny Side up to define the sunset area more.  Waited for that to dry a bit before sponging on Black on Black on the tip of my nail.  I applied the clear coat which smoothes the colors into each other.  Once dry I stamped with Konad – Black the house image from BM224 and used the bats image from BM213.  I haven’t mastered the art of cleaning up the edges of my nails, so pardon the mess but I’m no professional.  I gave it a coat of Seche Vite and wala!

The rest of my fingers got a base coat and two coats of On a Trip.  On the index finger I tried a freehand tree using Milani nail art black.  Then stamped using Konad – White the ghost image from BM223.  The middle finger was stamped with Konad – Black using BM213 bats image and part of the pumpkin image of BM224.  Ringer finger was stamped with Konad – Black using BM224 pumpkin image. Lastly the ring finger was stamped with Konad – Black using BM13 bats image.  All received a nice coat of Seche Vite.