Beauty tip for Women: Halloween Nail Art 3

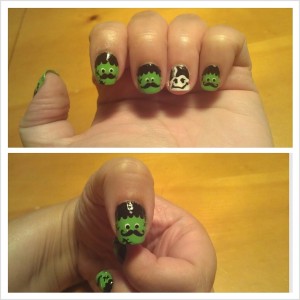
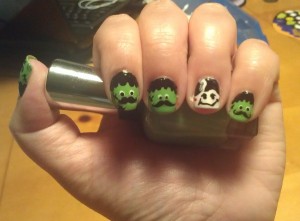
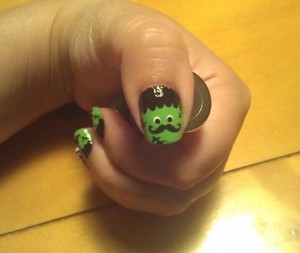
For my third Halloween nail art manicure I wanted to try out Frankenstein and the Bride of Frankenstein.  I have to say that the idea of doing freehand nail art scares me.  I’m simply not good at it and enjoy stamping better.  But I decided I wanted to challenge myself.  I also wanted to combine the mustache crazy in the manicure.  I love those mustaches.

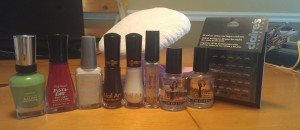
Here is what I used to create what I call “Meet Mr. Frankenstache and his Bride”:

  • Sally Hansen – Parrot
  • Sally Hansen – Rapid Red
  • Wet n’ Wild – French White Crème
  • Milani Nail Art Precision Brush – Black & White
  • Nailene Stripe Fx – Silver
  • Sech Vite – Base Coat
  • Sech Vite – Dry Fast Top Coat
  • Dotting Tools
  • Claire’s mustache nail art stickers

I started off with two coats of Parrot on all my nails expect the ring finger.  On the ring finger I did two coats of French White Crème.  I then did an outline of their hair using the Milani Black and with this same black dotted in the hairline/bangs.  Used Milani Black to make the lips and eyes on the Bride. Using Rapid Red I gave her cheeks some color.  I used Milani White to make the white hair strand on her head and Nailene Silver for the other strand on her hair.  For Mr. Frankenstache I dotted the eyes with Milani White then Black.  Made the stitch marks using the Milani Black.  It is hard to tell but I did add some of the Nailene Silver to the sides to make the bolts.  I then added the mustaches.


Beauty tips for Women: Halloween Nail Art 2

Here is my second Halloween nail art manicure.  My girls have been going crazy asking for candy corn and I finally purchased some.  This was inspiration for my festive candy corn Halloween nail art manicure.

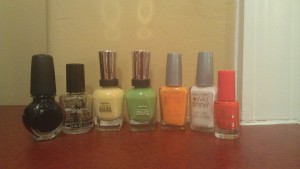
Here is a picture of the polishes I used for the manicure:

Konad Special Polish – Black
Seche Vite – Dry Fast Top Coat
Sally Hansen – Yellow Kitty
Sally Hansen – Parrot
Wet n’ Wild – Sunny Side
Wet n’ Wild – French White Crème
Essence – Wake Up
Color Club – Clear Coat

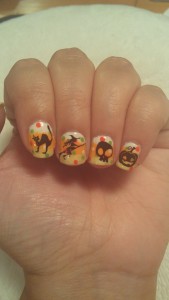
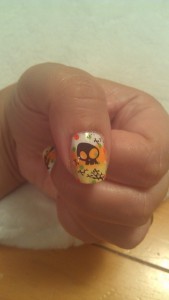
I started off by doing a gradient using the French White Crème, Sunny Side and Yellow Kitty.  I did three coats of the gradient because the yellow and orange colors where just two light and I wanted it a bit more richer in color.  Once I got the colors the way I wanted, I applied a clear coat to blend the colors.  I waited for it to dry then started applying random dots in Parrot, Wake Up, and French White Crème.  Once that dried up, I thought some stamping would be cute.  I used Bundle Monster – BM225 Skull image on the thumb.  The cat and witch used on the index and middle finger are from Shany – SH02.  The ring finger skull is Bundle Monster – BM211 and pinky finger is Bundle Monster – BM222.  Topped everything off with Sech Vite.

Here are the pictures of my festive candy corn Halloween manicure:


Homemade Halloween Costumes for Kids: Mickey Mouse Pirate

Although this site is mainly devoted to beauty tips for women on occasion I like to share some other stuff I’m into like sewing.  I’m very much a beginner at sewing; so this is no project runway type stuff.

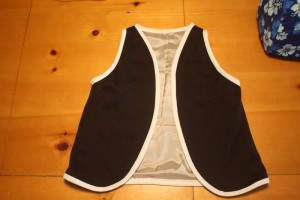
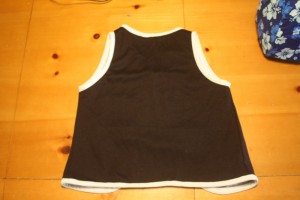
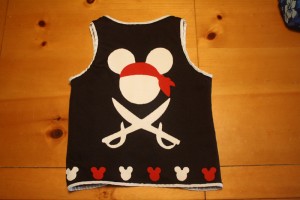
My youngest, 3, wants to be a pirate.  You think no problem with that, except she wants to be a Mickey Mouse Pirate.  I can’t just step into the Disney Store and pick one up.  They do have some Pirates of the Caribbean costumes but they are mainly for boys and they don’t have Mickey Mouse on them.  She wants Mickey Mouse all over this costume.  So this would have to be a homemade Halloween costume.  I couldn’t find a vest, so one had to be made.  Here is a front and back picture.  A simple vest nothing crazy.


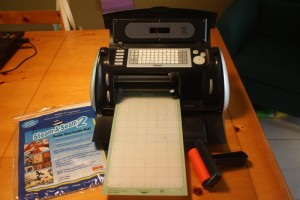
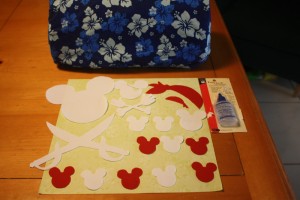
I then need to create the images that I would use for the vest.  Below is a picture of what I used: my computer, Cricut Create, a Cricut mat, Sure Cuts A Lot 2 software, a brayer, Steam-A-Seam 2, Fray Check, and white and red fabric.


Once I created my images on the computer, I ironed on the Steam-A-Seam to the pieces of white and red fabric.  Used the Cricut Create and Sure Cuts A Lot 2 to cut out the images.


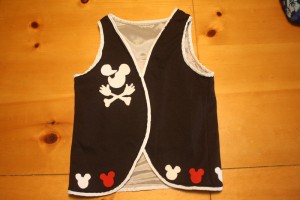
I then ironed on the images to the vest to create the Mickey Mouse Pirate look. I applied Fray Check so that the images would not fray.


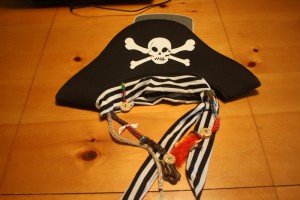
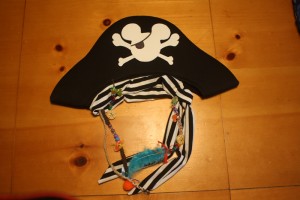
The pirate hat was a bit trickier.  I picked up the hat at Clarie’s.  This is what it looked like before the full transformation into the Mickey Mouse Pirate hat.  I wanted to give it the Jack Sparrow feel by adding some dangly things to it and I would have loved to try my hand at dreadlocks but I don’t have the time for that.  So yarn pieces braided up was the best I could do.


I still needed to get Mickey on the pirate hat.  The idea I came up with was to cut Mickey Pirate out of a foam sheet and sew him onto the hat.  I couldn’t use fabric because it didn’t cover up the skull, it was too transparent.  The foam sheet cut out worked like a charm.


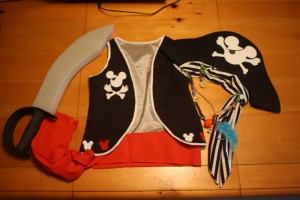
Here is the Mickey Mouse Pirate or as she says the Mickey Pirate costume for Halloween this year.  I picked up the sword at Target and the sash was made from red fabric.  So to complete the outfit she will have on a white t-shirt and black pants.    Now if only I had time to make myself one too but I have to work on my oldest daughter’s costume.