Beauty tips for Women: Blow drying your hair using Turbo Power’s Turbo 1500

Of all the beauty tips for hair that I have heard and practiced, the one that is the most important to me is the investment in a good blow dryer.  I’m not a professional hairdresser, beautician, hair stylist or nail technician but I do enjoy dabbling in those areas.  I host what I like to call Blow Drying parties.  I mainly do friends and families hair Fridays for the weekend or Sundays to start off the workweek.  So I need a reliable blow dryer that will get the job done.

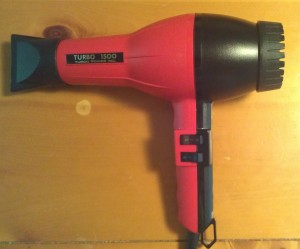
Here is a picture of my trusty blow dryer made by Turbo Power Inc. – Turbo 1500.  I purchased this blow dryer in 2001, so that is 11 years with the same blow dryer.  The Turbo 1500 has never broken down on me.  Granted I do clean it and take care not to mangle the cord.  This Turbo 1500 is a professional stylist blow dryer made in Italy.

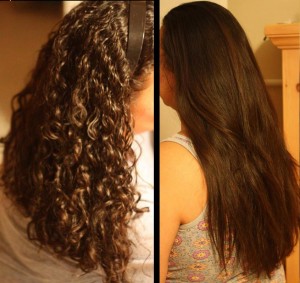
Until I had purchased this 11 years ago, I would go through blow dryers like water.  I have curly hair and can blow dry my hair straight without any issues using this blow dryer.  Here is a picture of my hair curly then blown dry straight with the Turbo 1500.

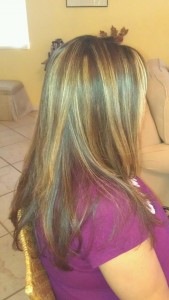
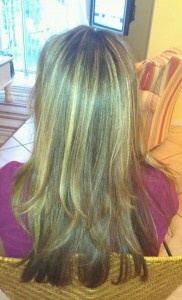
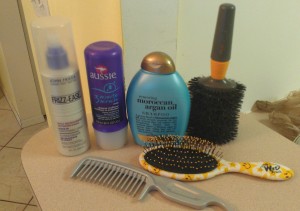
Here is a picture of a blow dry I did over the weekend along with the products I used.  I totally forgot to take a picture of her hair before hand.  The hair care products are Organix Moroccan Argan Oil Shampoo, Aussie 3 Minute Miracle, John Frieda’s Frizz-Ease Leave In Conditioner.  As you can tell she has highlights that look awesome but all the dying has dried out her hair.  The combination of products used gave her hair a lot hydration and conditioning, which she needed.  I used my trusty Wet Brush to detangle her hair and an oval shaped brush from Goody – Get Smooth Volume Natural Shine Boar Bristles (Review coming) to dry her hair.

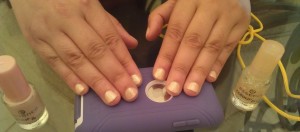
To finish everything off I did a simple manicure that goes with everything using Essence Modern Romance and Space Queen over it.

If you are looking for a blow dryer I strongly recommend a blow dryer made by Turbo Power Inc.  Mine is an oldie but goody and is still working great after 11 years.  So you can imagine what the newest ones can do.


I give Turbo Power 5 brains and recommend you to get more information from this site.

Beauty Tips for Women: Halloween Nail Art

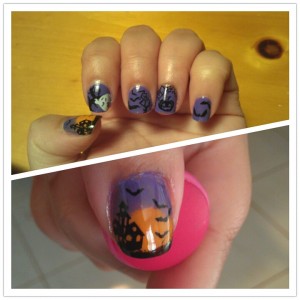
This is my first every attempt at Halloween nail art.  I don’t particularly like scary Halloween stuff and neither does my little girls; so I opted to do something a little cutesy and spooky.

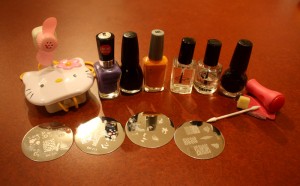
Here is a picture of all the items used to get the manicure going:
Wet n’ Wild – On a Trip (213C)
Wet n’ Wild – Sunny Side Up ( 405)
Sinful Colors – Black on Black
Color Club – Clear Coat
Seche Vite – Base Coat (not in pic)
Seche Vite – Dry Fast Top Coat
Konad Special Polish – Black
Konad Special Polish – White (not in pic)
Milani Nail Art Precision Brush – Black (not in pic)
Bundle Monster Plates: BM13, BM213, BM223, BM224
Q-Tip
Makeup sponge

The thumb background was created using the gradient effect.  I started off with Seche Vite – Base Coat (forgot to place it in the picture).  Then applied one coat of Sunny Side Up.  Using the make up sponge (cut to a small size) I applied On a Trip and began to sponge from the top of the nail down and beginning to shape the sunset.  I let it dry a little before I sponged on Sunny Side up to define the sunset area more.  Waited for that to dry a bit before sponging on Black on Black on the tip of my nail.  I applied the clear coat which smoothes the colors into each other.  Once dry I stamped with Konad – Black the house image from BM224 and used the bats image from BM213.  I haven’t mastered the art of cleaning up the edges of my nails, so pardon the mess but I’m no professional.  I gave it a coat of Seche Vite and wala!

The rest of my fingers got a base coat and two coats of On a Trip.  On the index finger I tried a freehand tree using Milani nail art black.  Then stamped using Konad – White the ghost image from BM223.  The middle finger was stamped with Konad – Black using BM213 bats image and part of the pumpkin image of BM224.  Ringer finger was stamped with Konad – Black using BM224 pumpkin image. Lastly the ring finger was stamped with Konad – Black using BM13 bats image.  All received a nice coat of Seche Vite.

Sally Hansen Xtreme Wear – Blue It Review

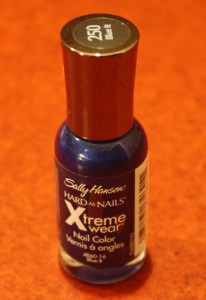
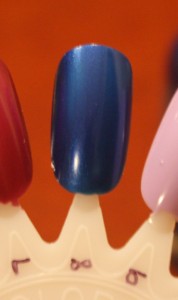
My first beauty product review is of Sally Hansen Xtreme Wear in Blue It (250). This was my very first nail polish. I picked this stunning blue up at Ulta on clearance. It is almost like a royal blue with a bit of shimmer to it. The formula is wonderful. It wasn’t runny or streaky.

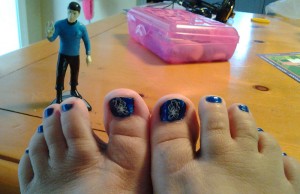
I started off by doing a pedicure and one coat was all it took; pardon the cleanup job. I added a decal, which made the pedicure even pop more. Clearly Spock approves … lol …


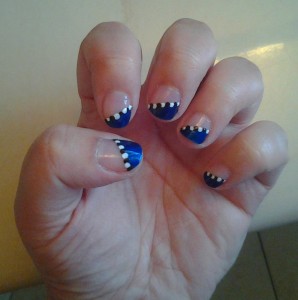
I still couldn’t get enough of this color and opted to do a manicure. I had also just picked up a set of Mash dotting tools (review coming in the future). I did a clear base coat using Sally Hansen Green Tea + Bamboo Strengthener, which is a base and topcoat (review coming in the future). I placed tape on the diagonal to cover part of my nail and the exposed part painted with Blue It (250). One coat is all it took. Then added black and white alternating dots. Covered with the Green Tea + Bamboo Strengthener and was done. This manicure lasted over a week with no chips. I was truly amazed.

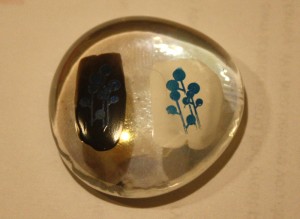
Since I am into stamping I wanted to share a sample of how Sally Hansen Xtreme Wear – Blue It performs as a stamping polish. I placed a quick swatch of black polish and white polish over my tester stone (thanks so much to soguesswhat11 for that fantastic idea, check her out on youtube). It picks up nicely on the stamper and transfers well on white but does not show up well on the black. So a thumbs up on light colors and thumbs down on dark colors. The image stamped is from Bundle Monster plate BM06.

I give Sally Hansen – Blue It 5 brains