Mini Graduation Cap DIY

Sharing a DIY mini graduation cap. The school colors are blue and gold. I wanted to sparkle it up a bit.

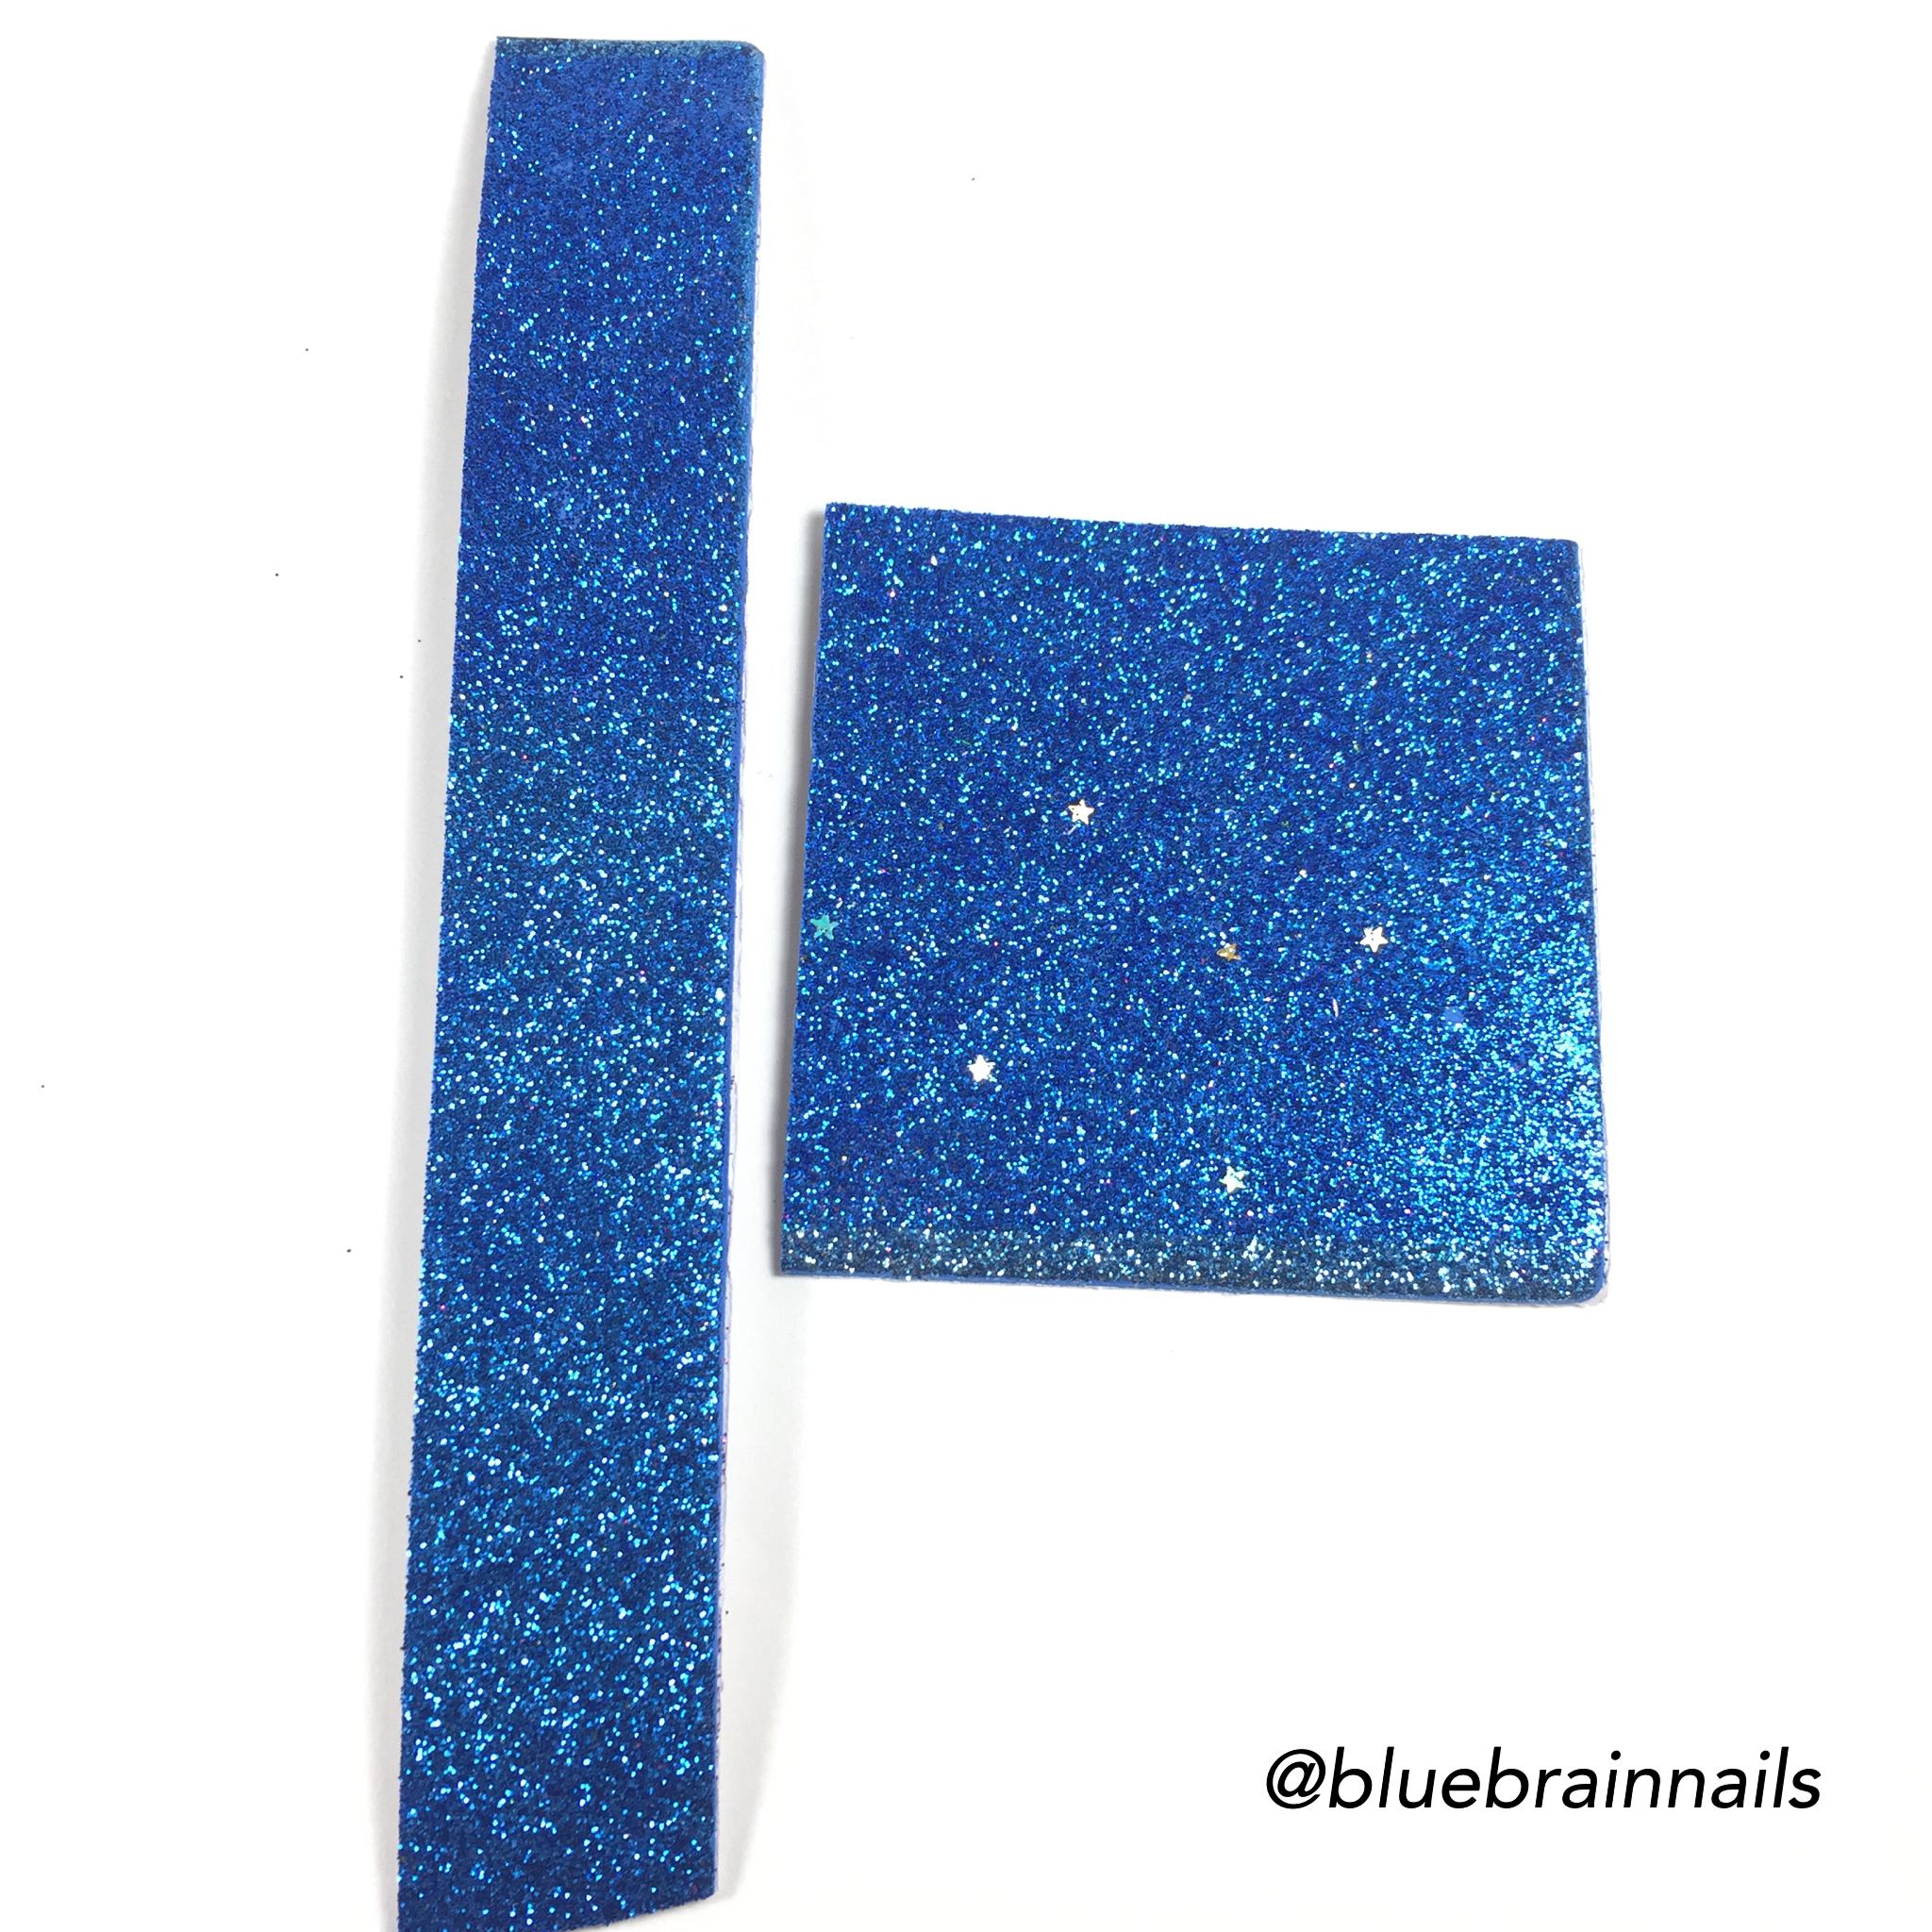
I used a blue sheet of Darice Glitter Sticky Back Foam. I cut the square and a long rectangle.


I used a blue card stock to stick the square foam piece to. Even though the foam has a sticky back, I did use more glue to secure the card stock. 
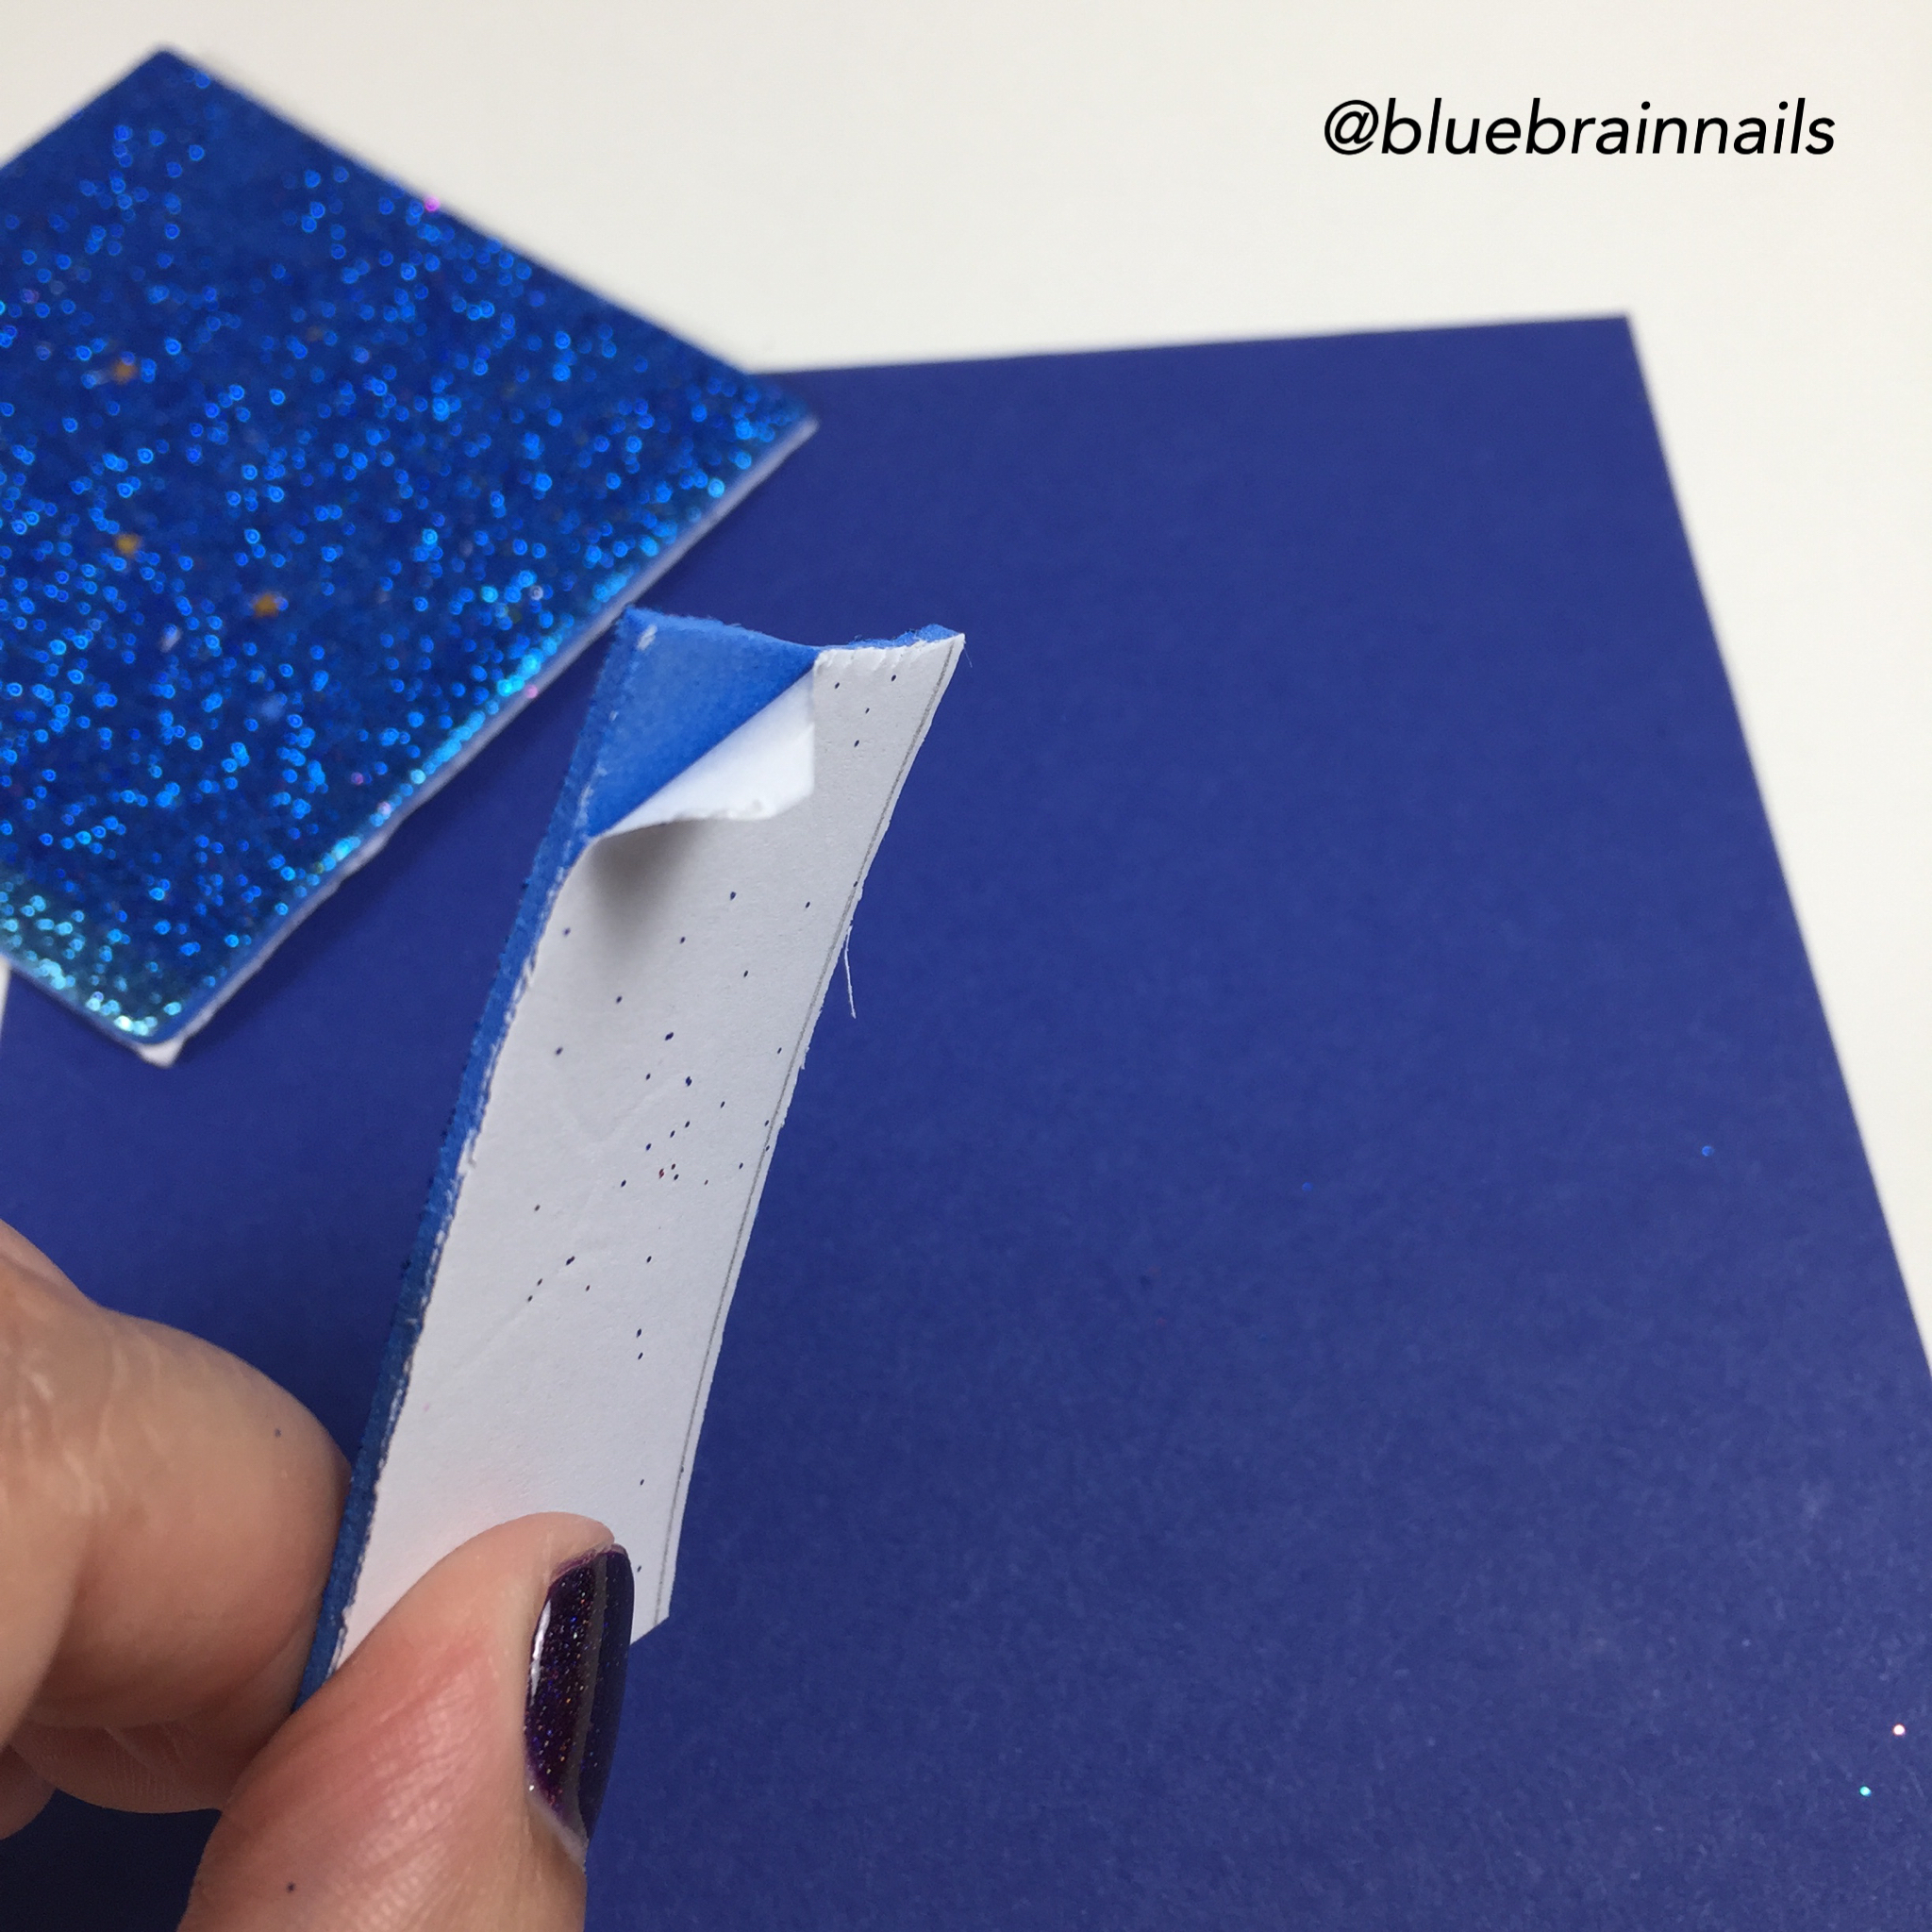
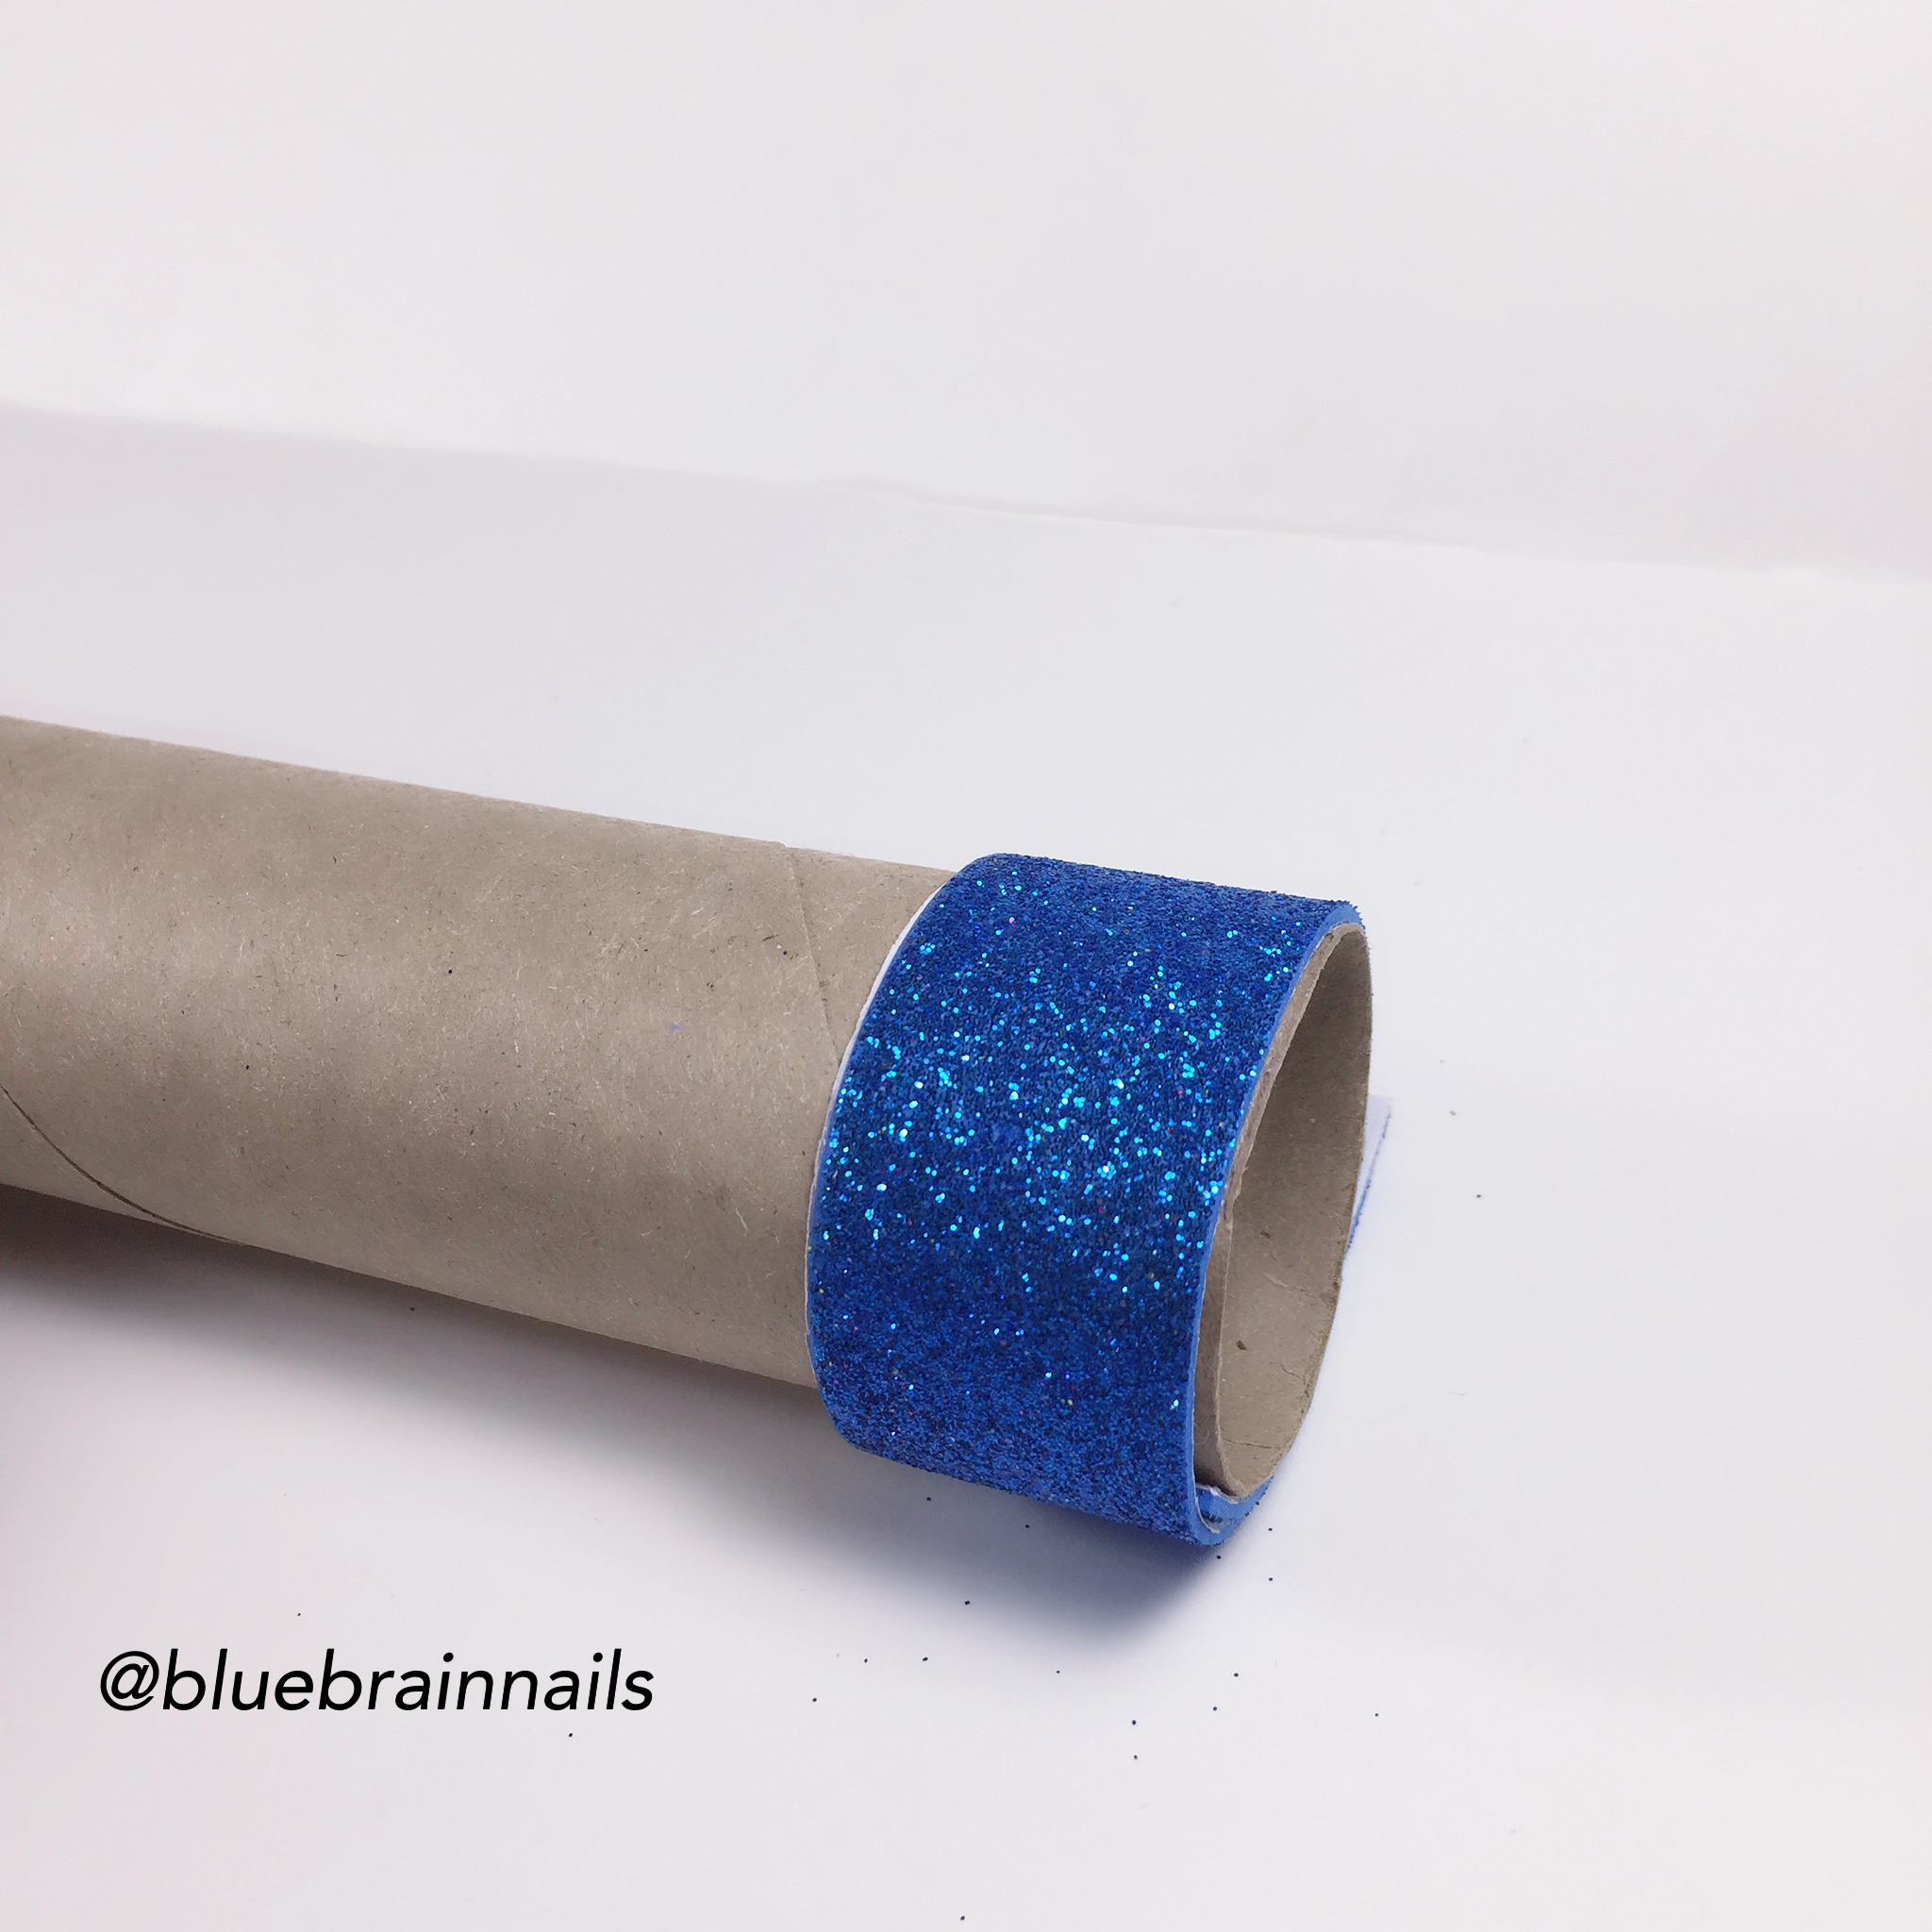
For the base, I used a paper towel tube. I used the previous cut rectangle foam as a guide to cut the tube. Then all I had to do was stick the foam on to the cut tube. 
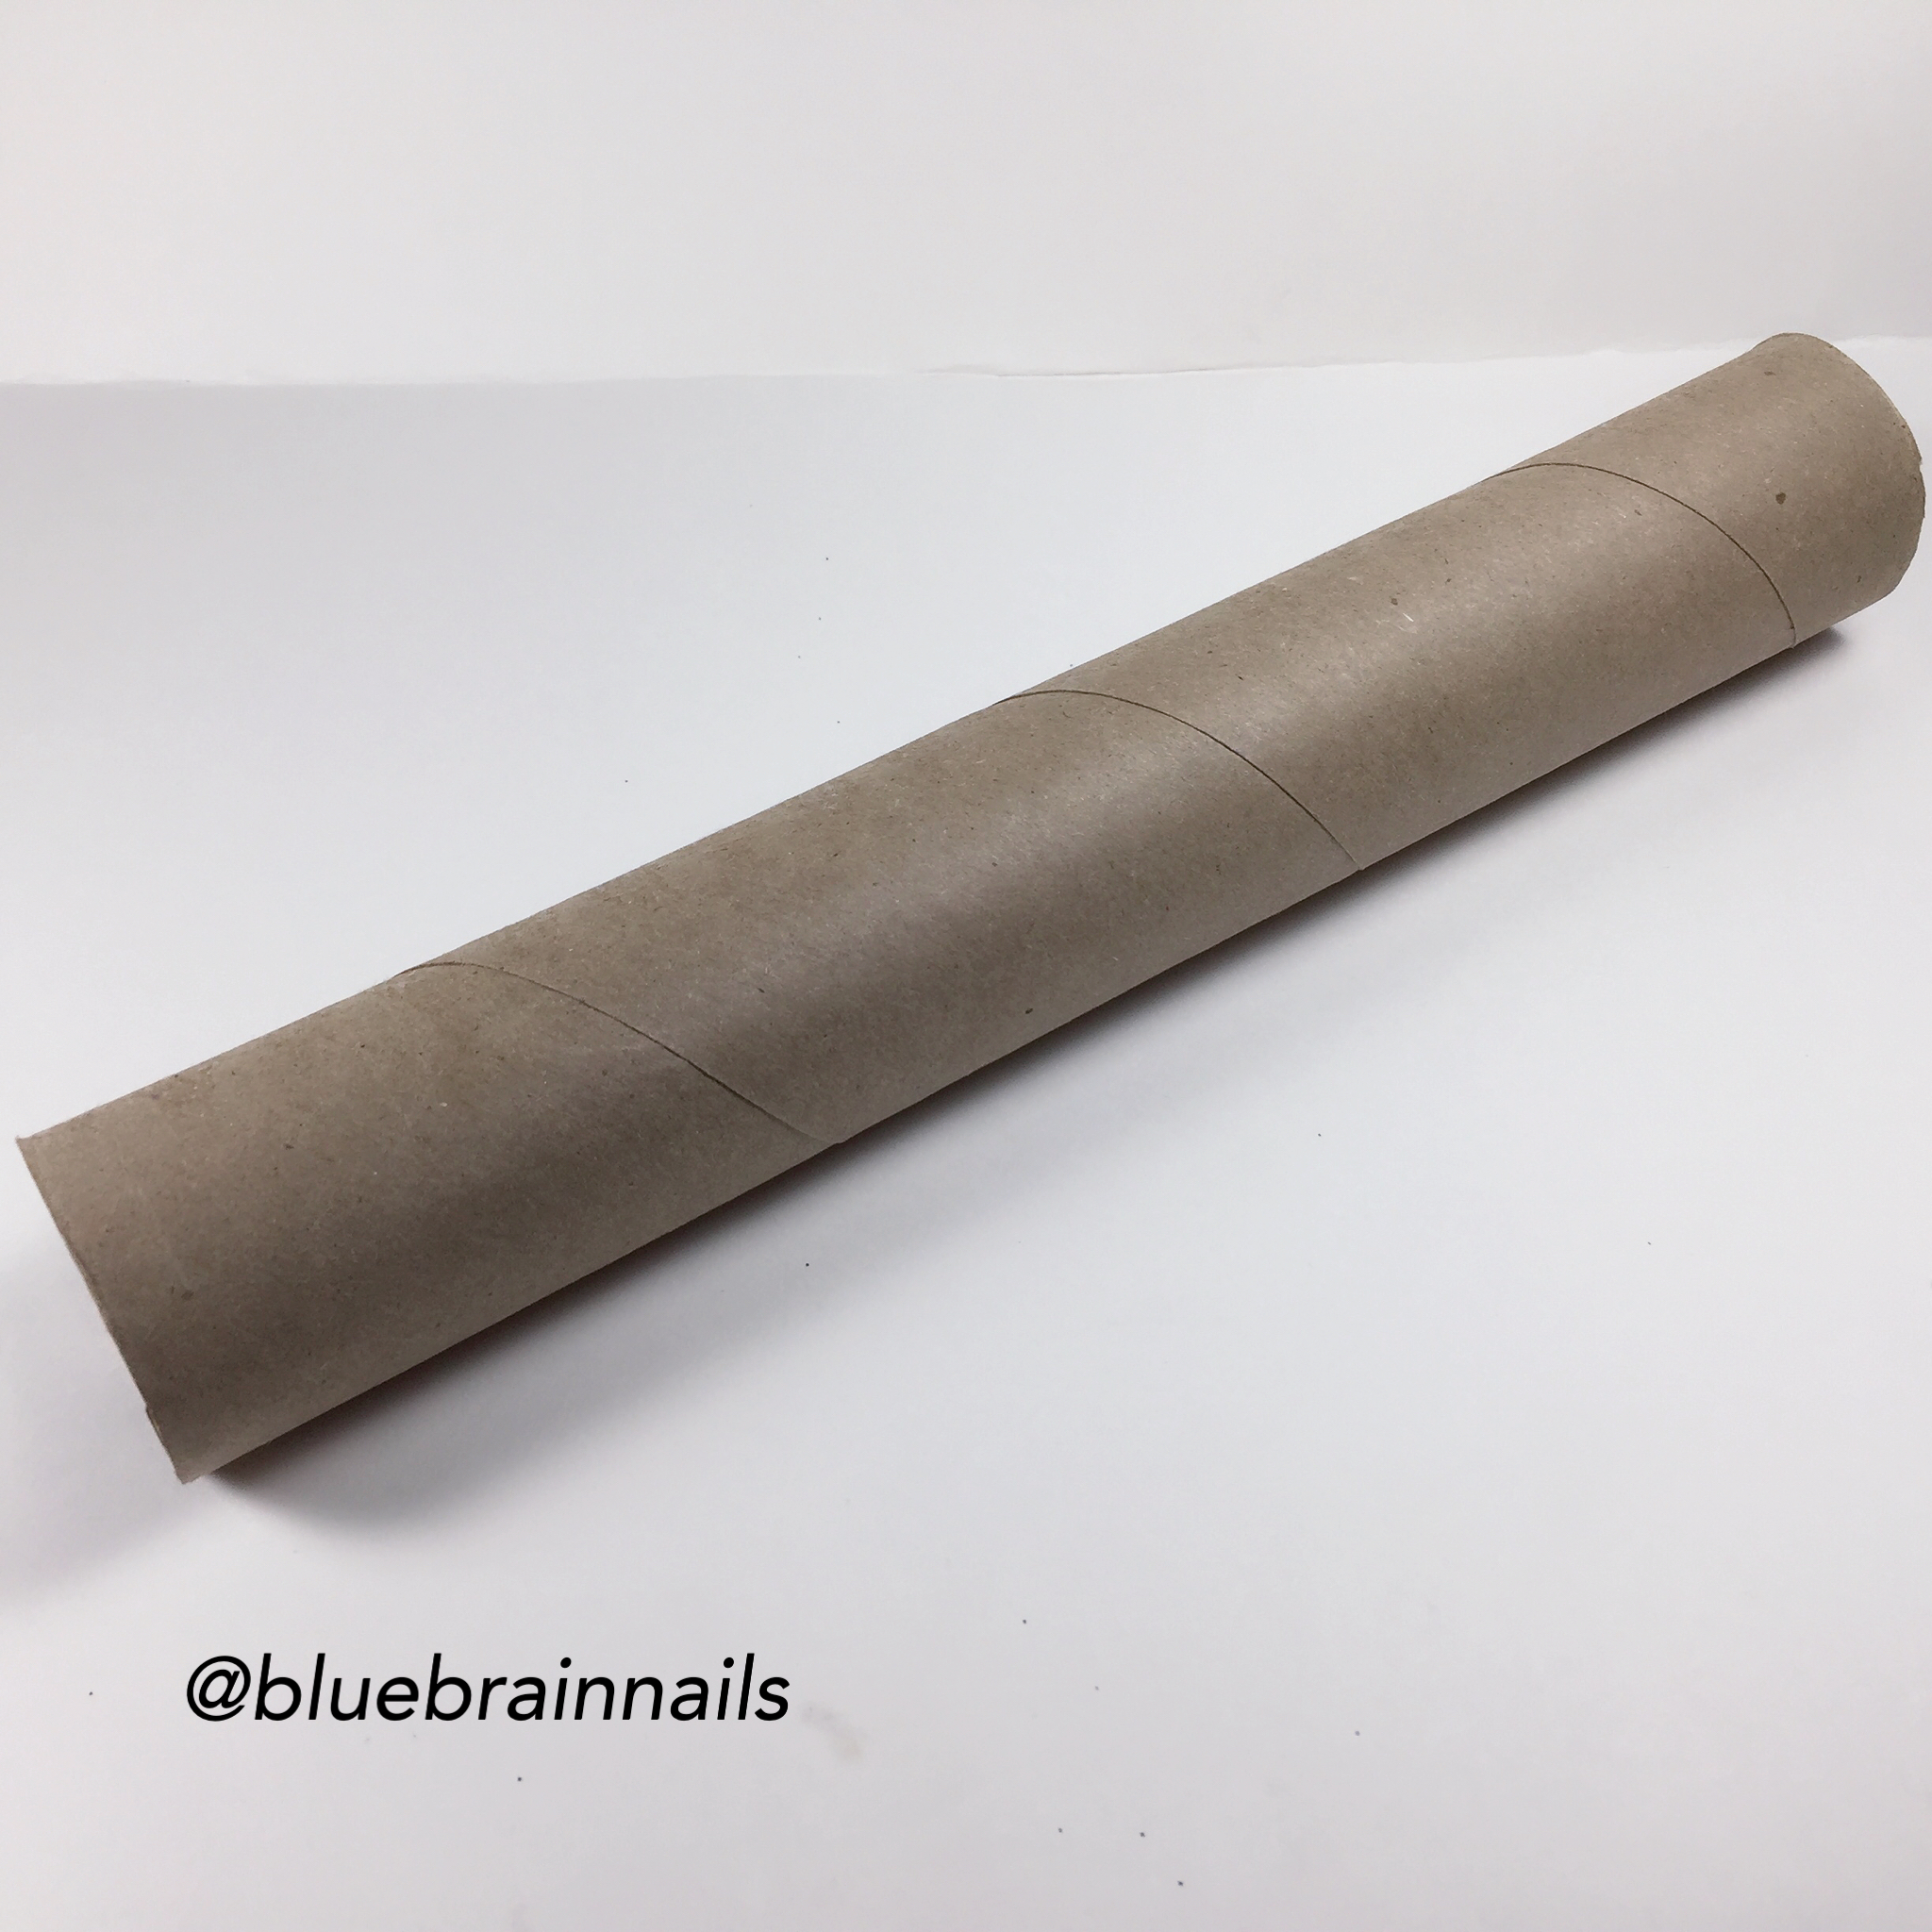
Next I marked where I wanted to position the brad at the top of the cap. Once I figured that, I painted it with a nail polish that was a close match to the blue glitter foam. Stuck the brad in once the paint was dry.


I glued the top and the base together using a glue gun.  
For the mini tassel, I used a fork and embroidery floss. I followed the instructions of this YouTube video. I lifted the brad and looped the tassel on it. 
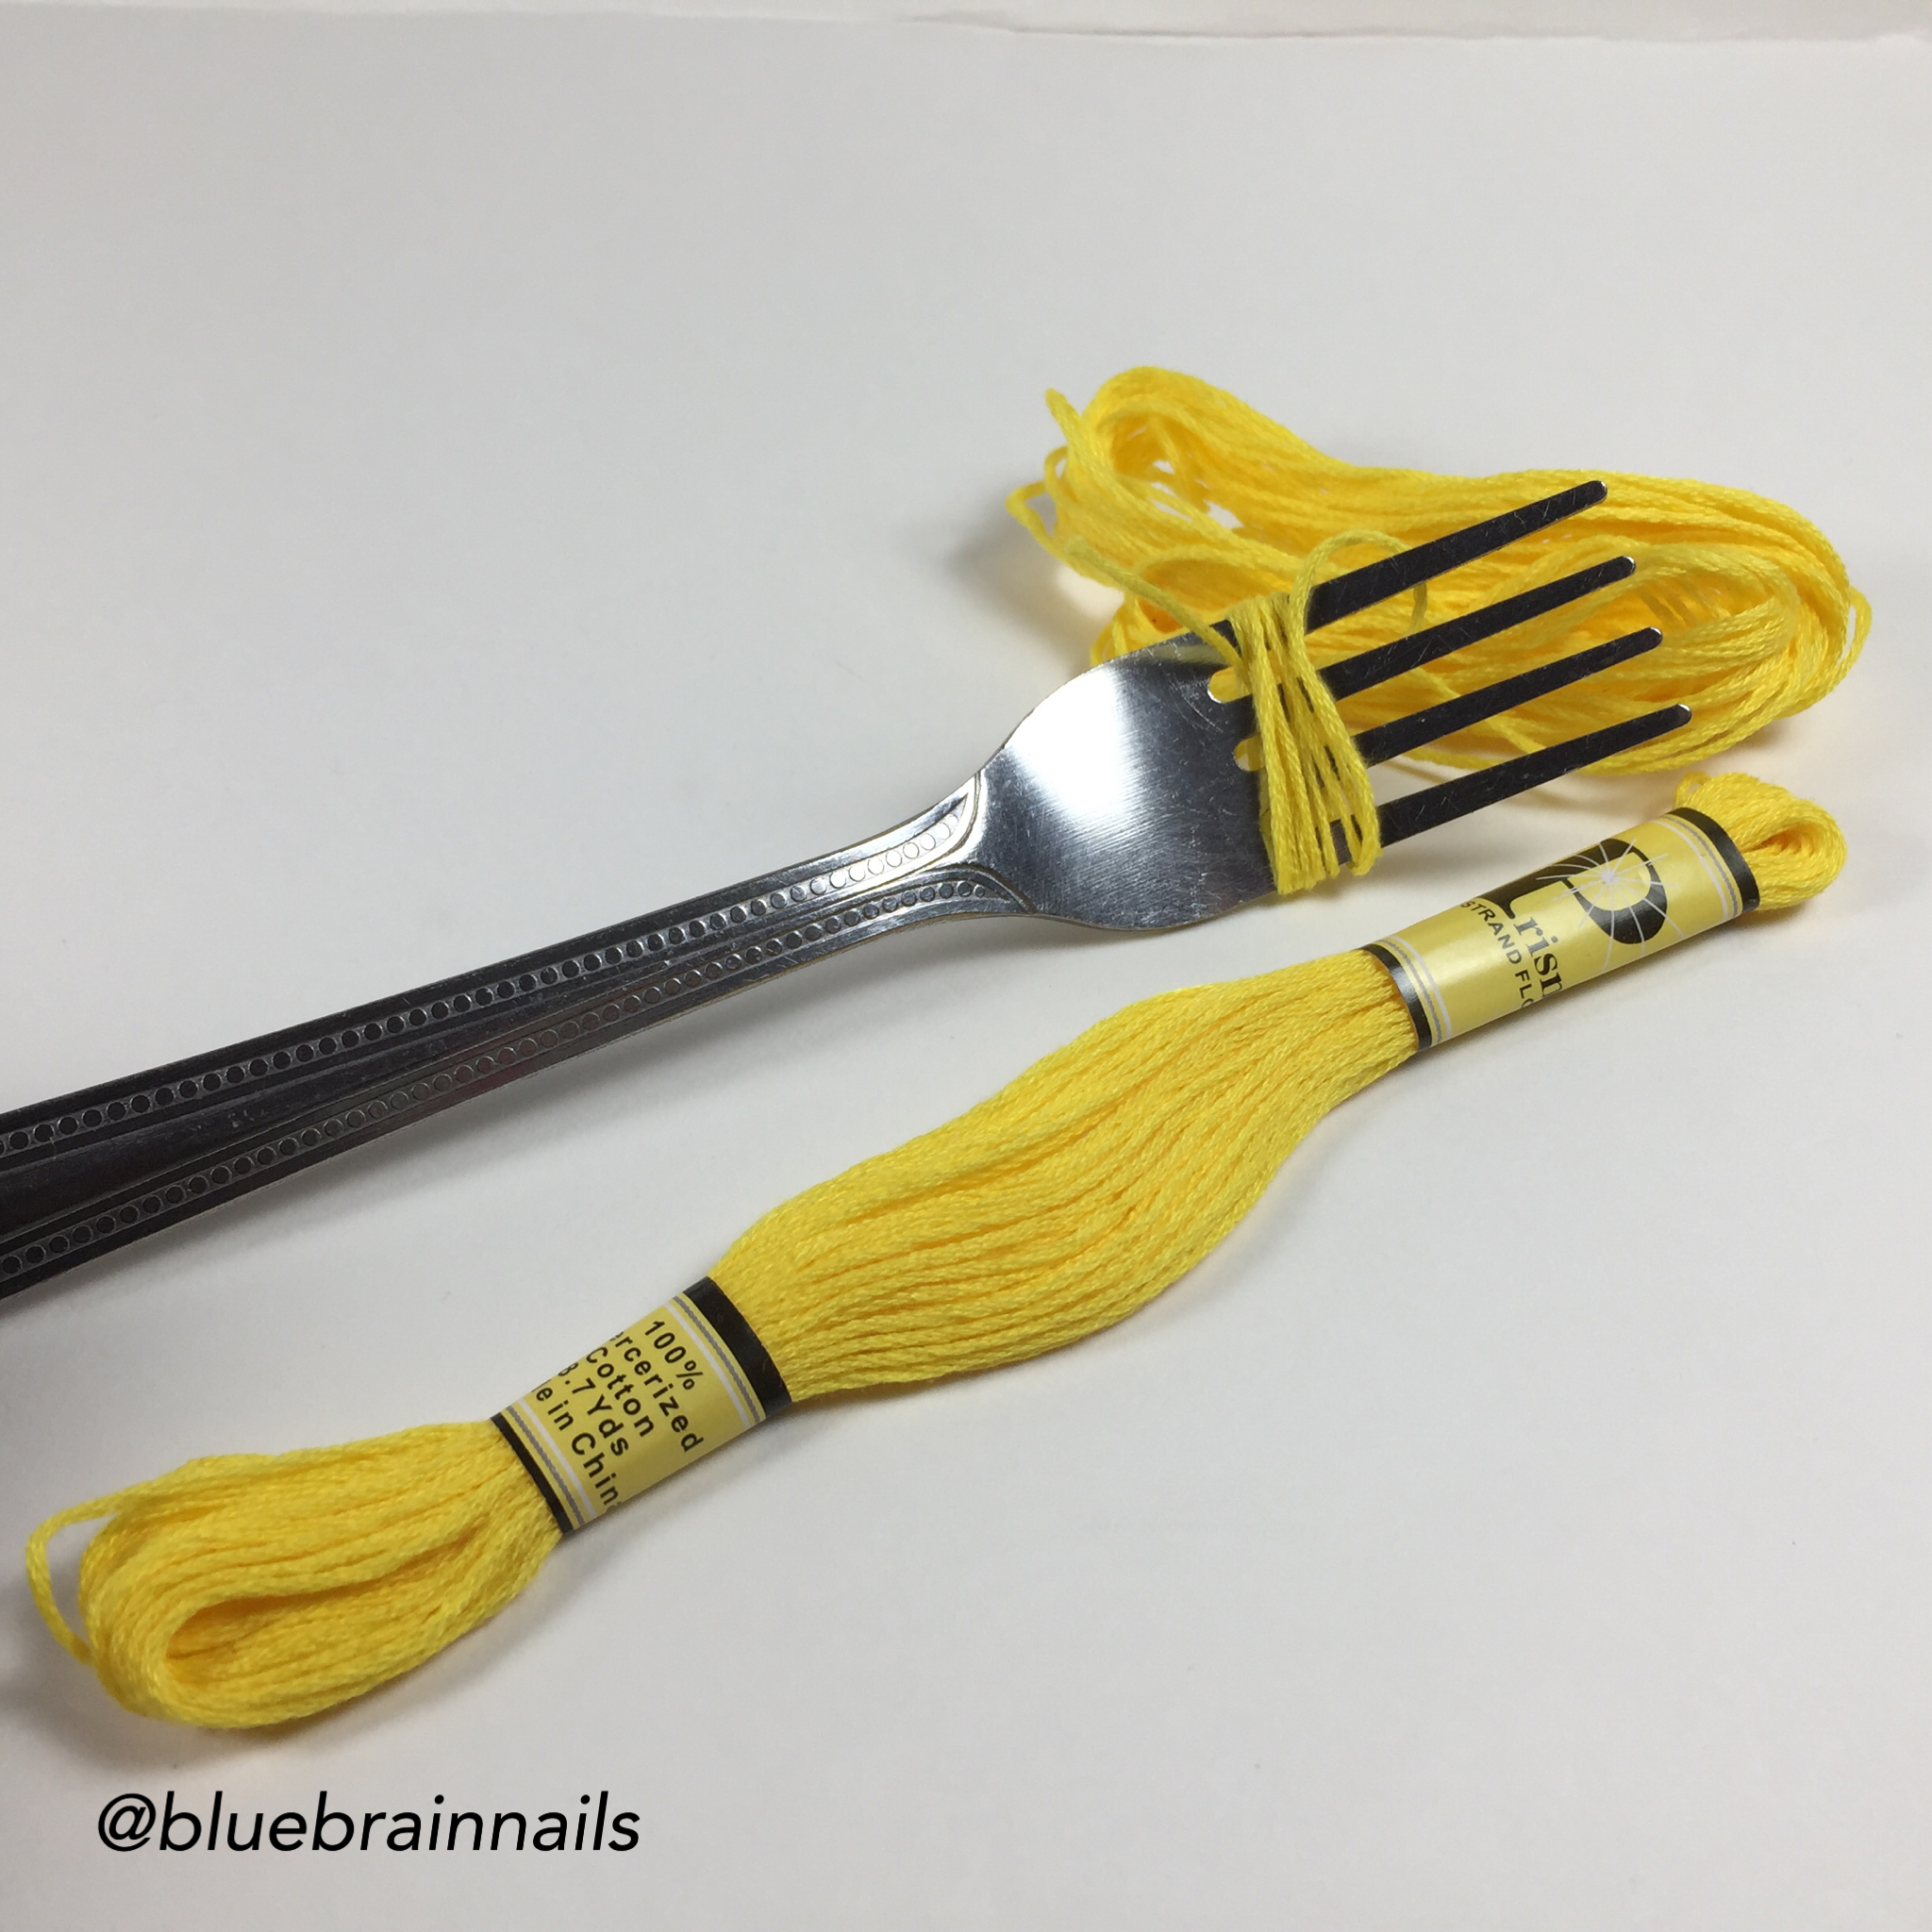
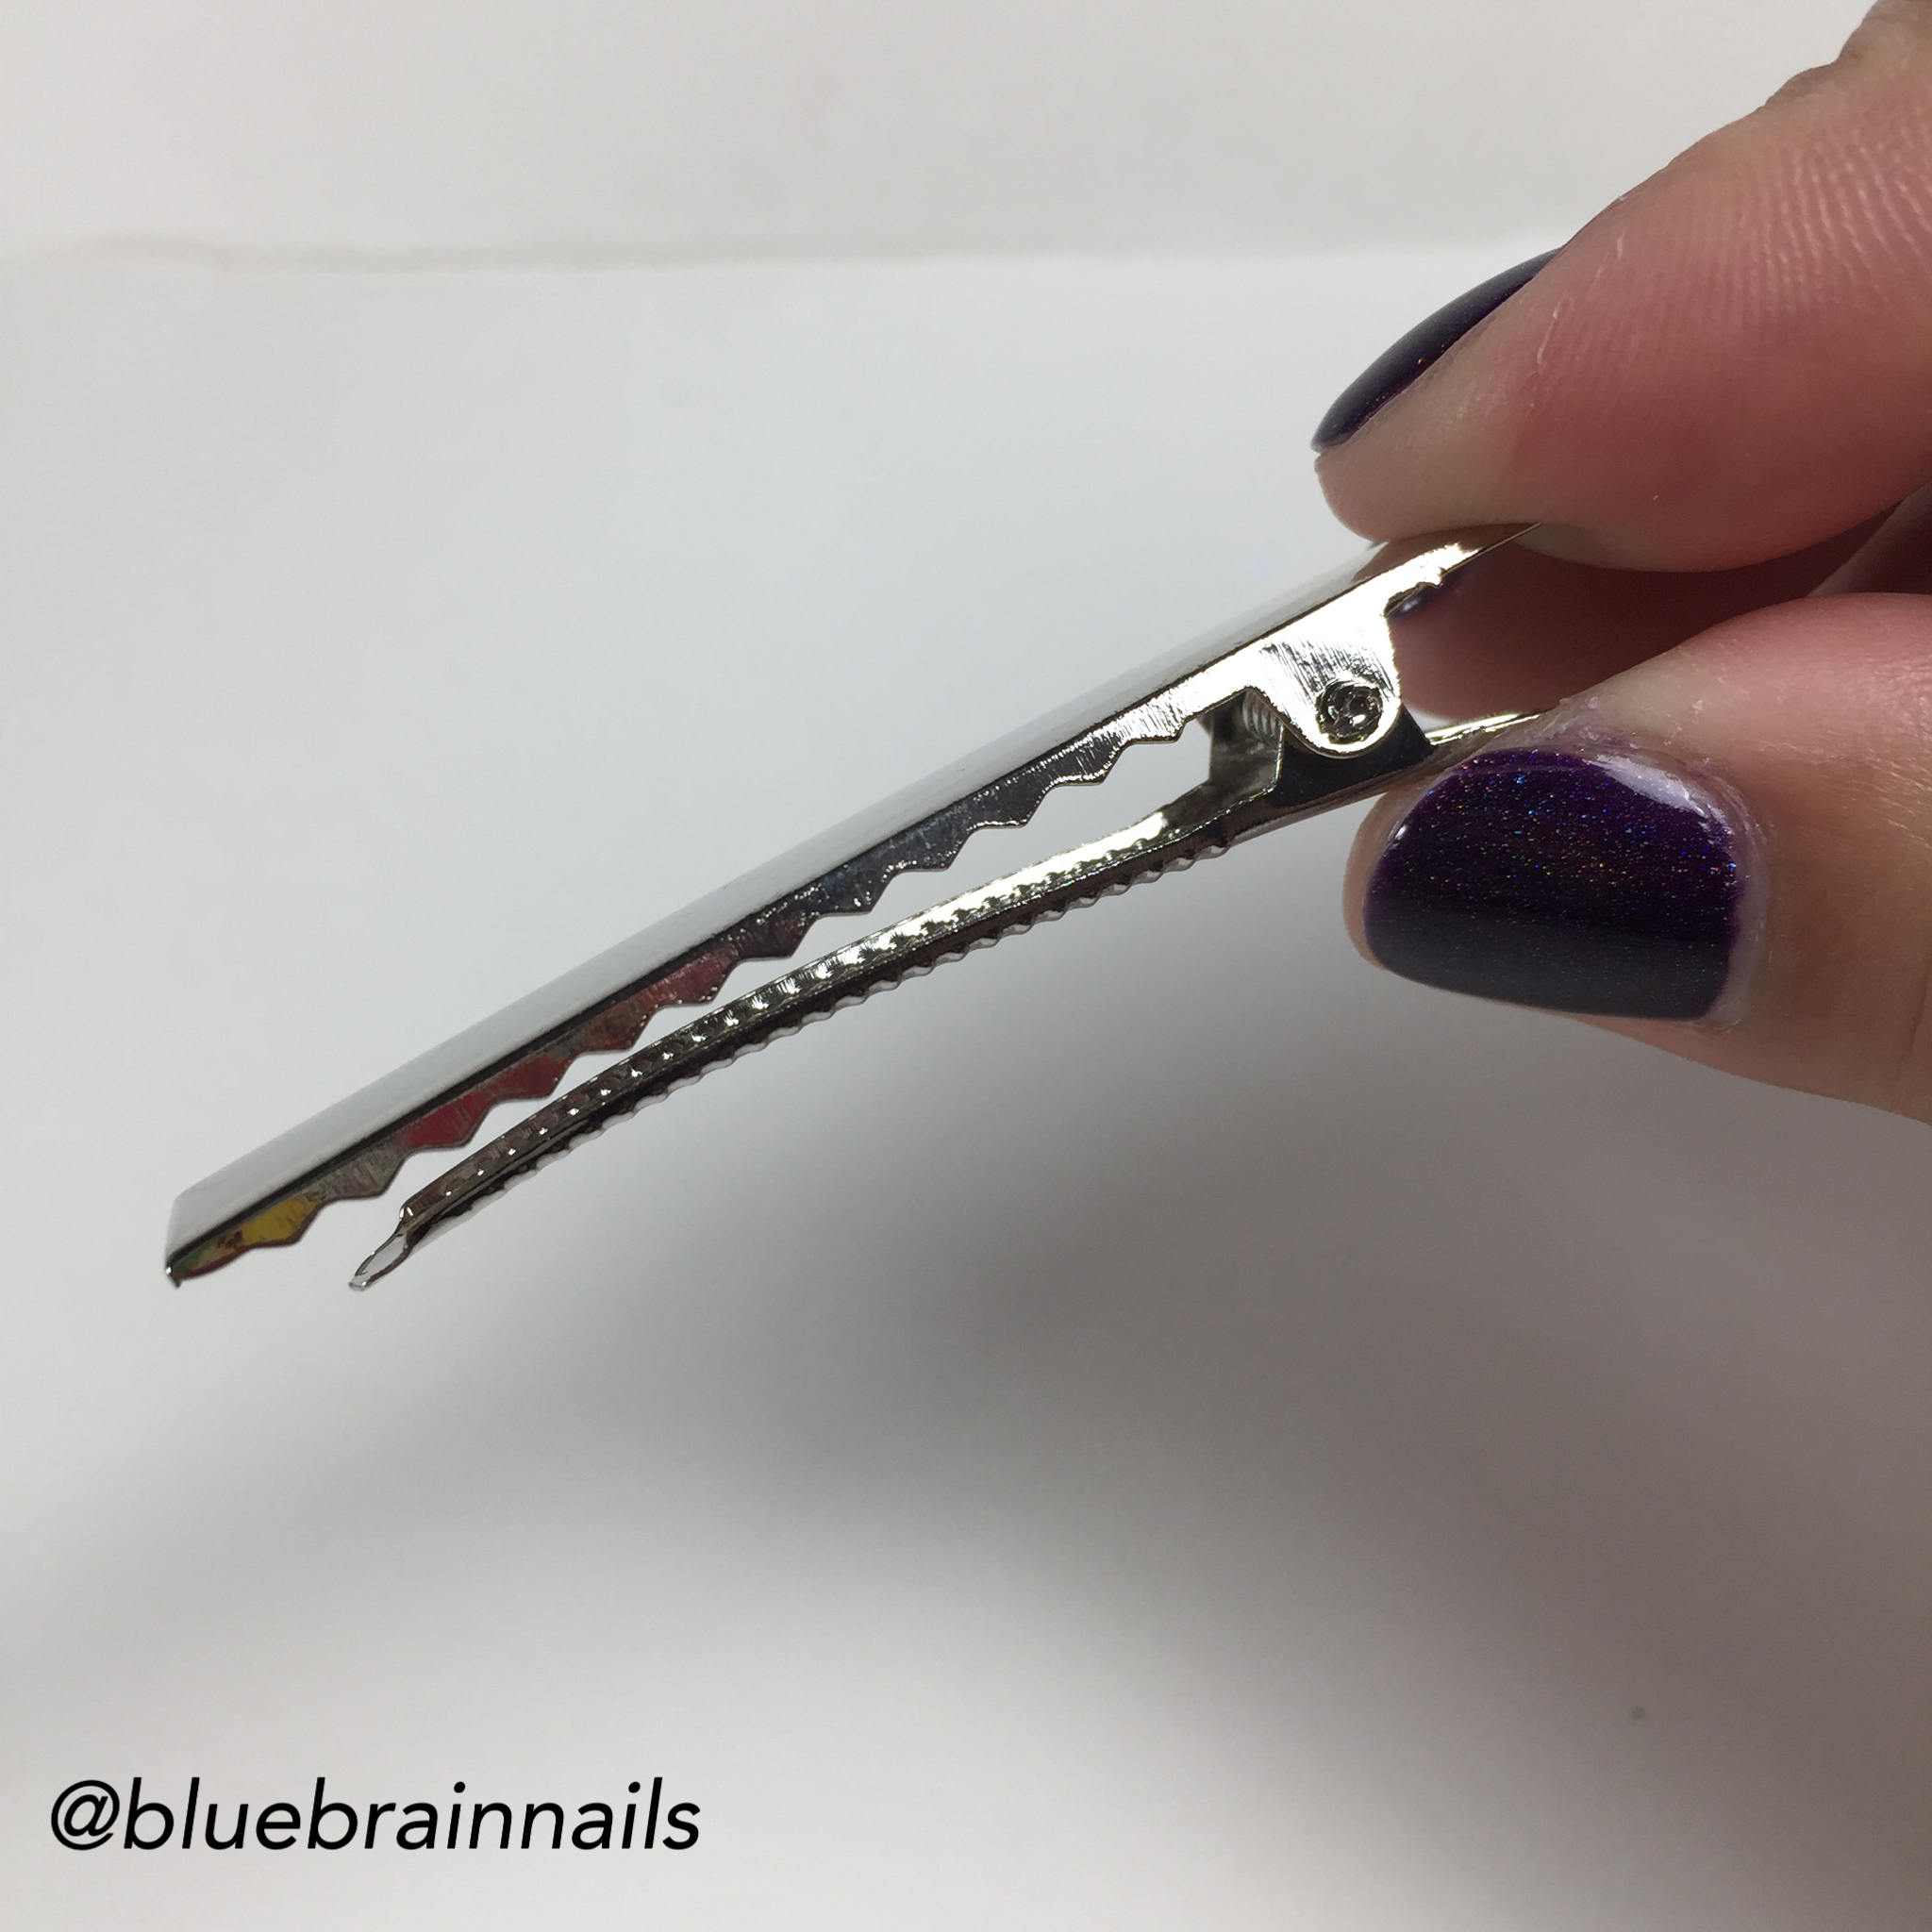
Finally, I glued a clip to the base.


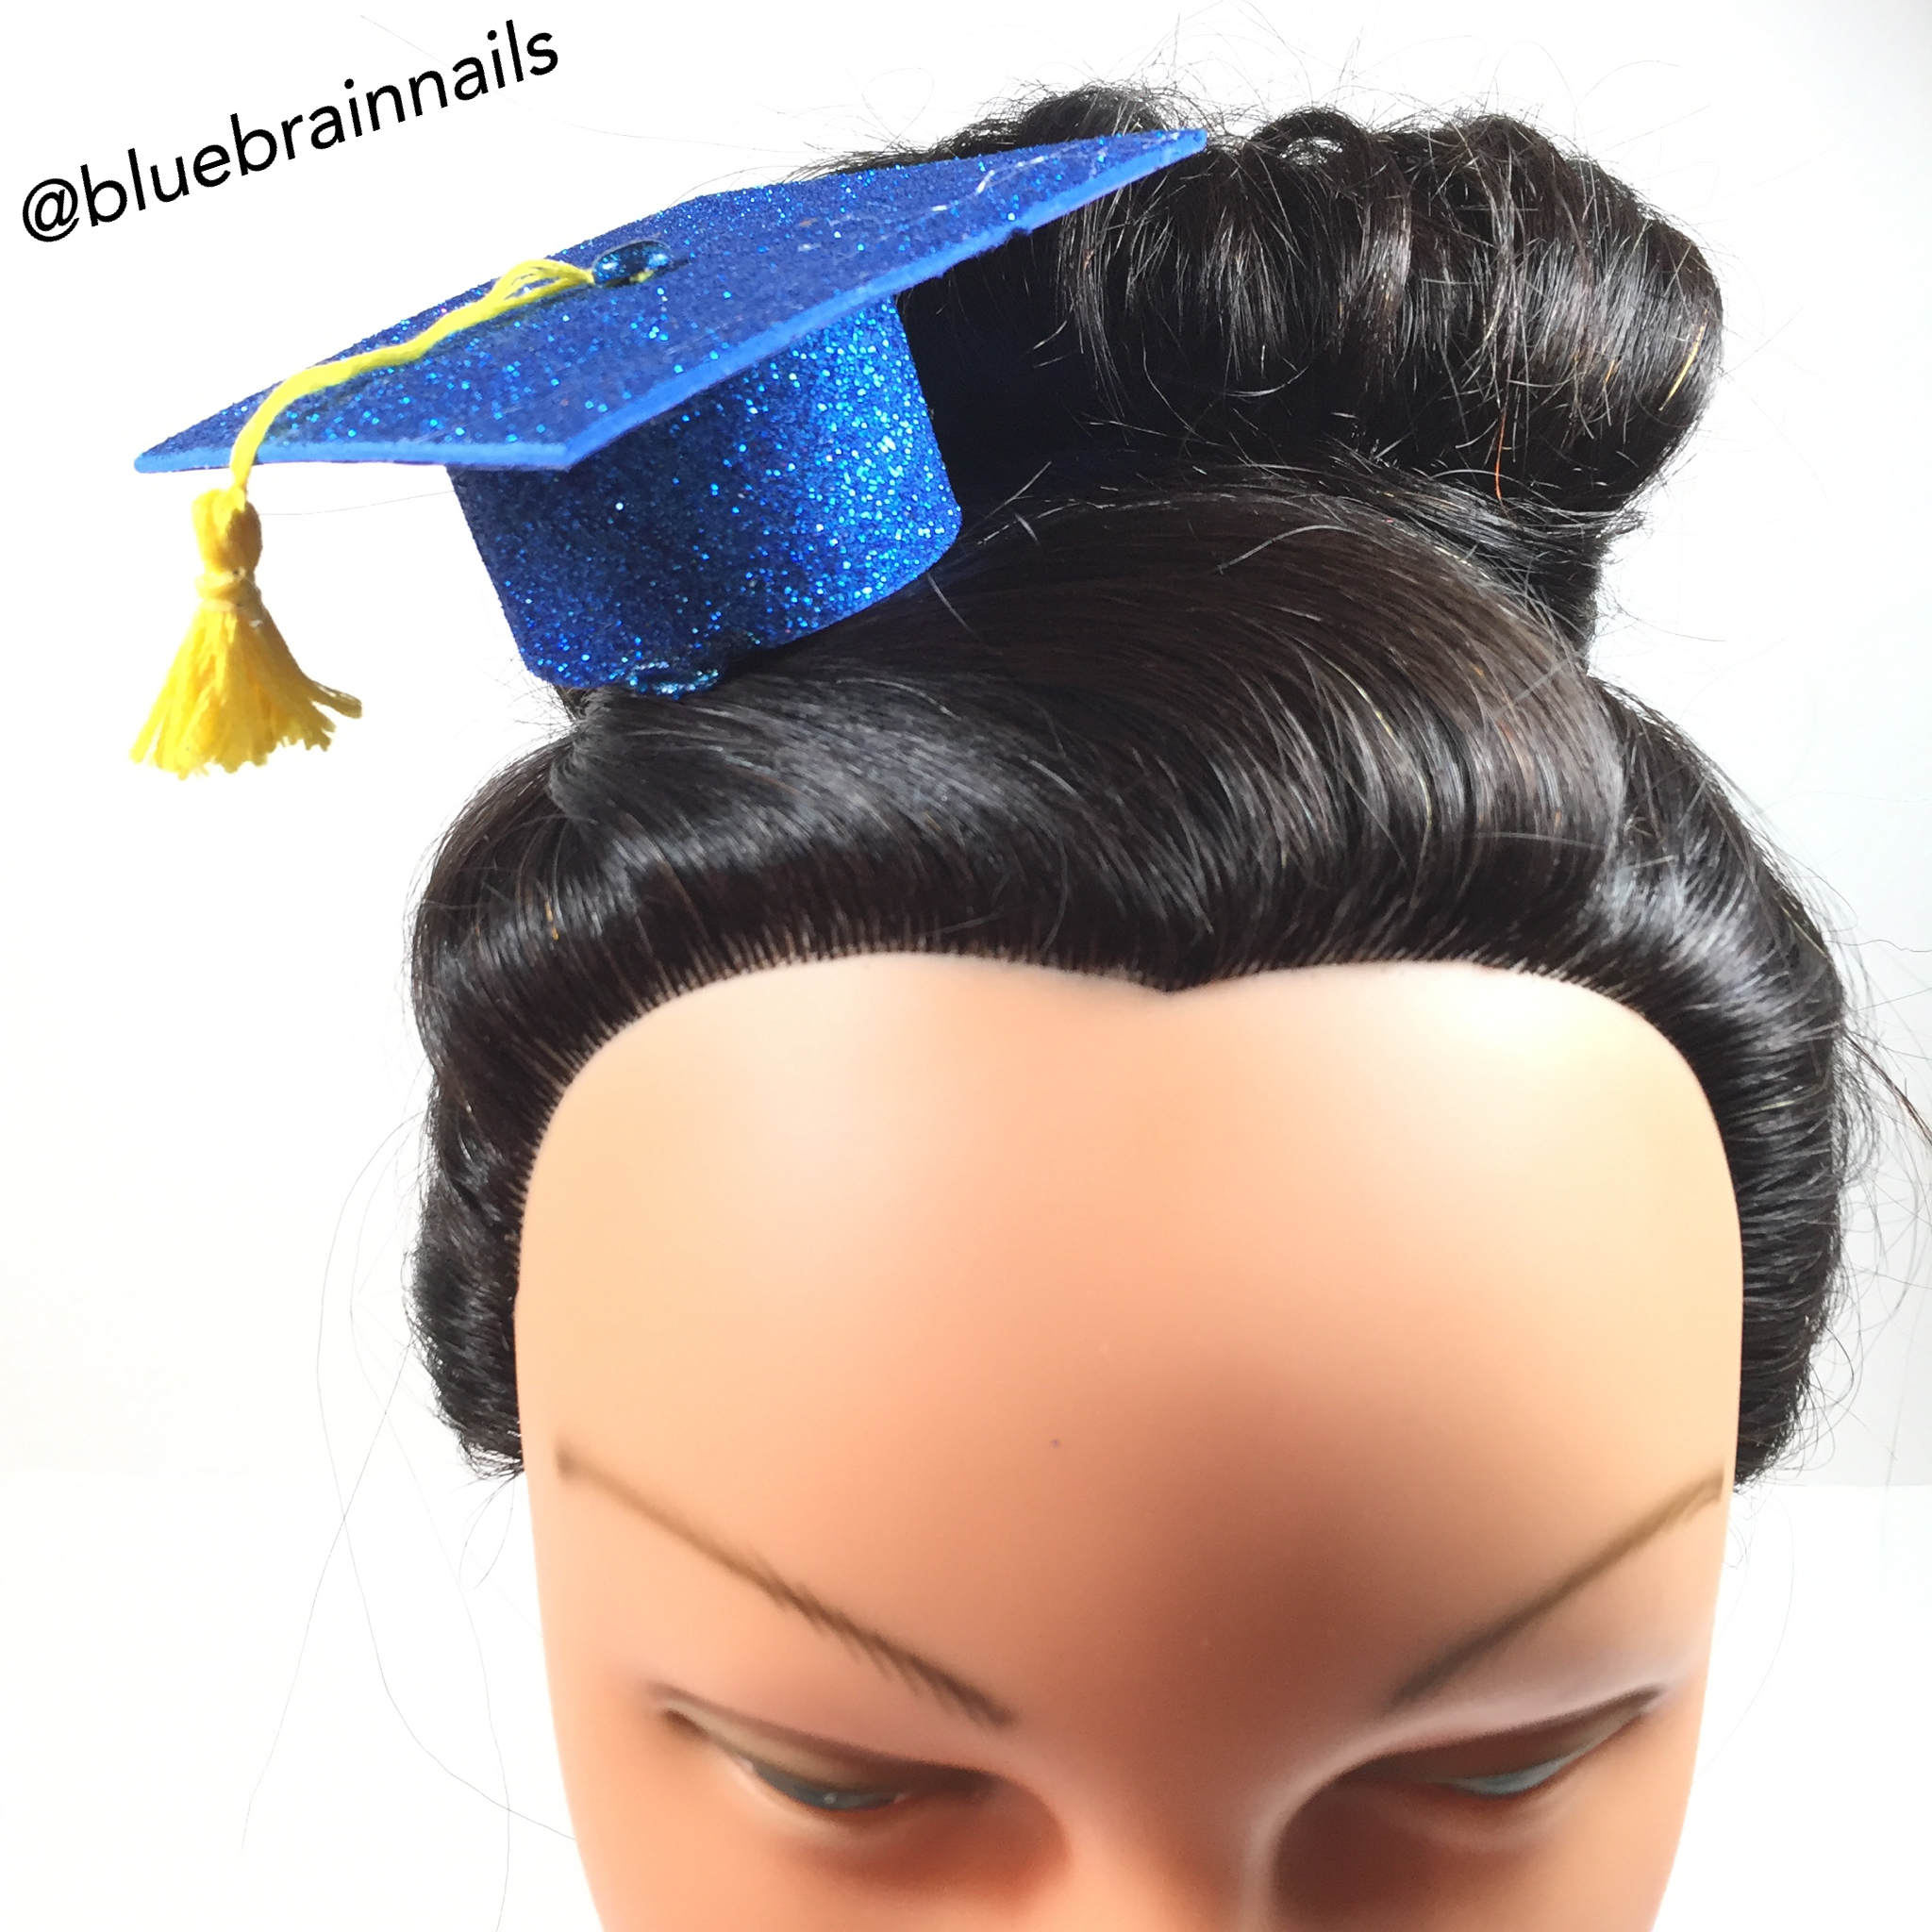
Here is the finished mini graduation cap. 

Mermaid Crown DIY

Sharing a DIY mermaid crown project I did with my girls. I followed a tutorial on YouTube from My Froggy Stuff. My Froggy Stuff does some awesome crafting.


Products used:
Sea Shells
Wired Twine
Charms
Beads
Pearls
Side Hair Combs
Hot Glue Gun


Measured everyone’s head and made the crown frame using the wired twine. After completing the crown, I added the side hair combs for added security. 

Everyone had something different in mind when it came to color and design. We had fun putting it together and came up with three different crowns. 

I still need to make one for myself. So, I’ll be working on that one soon enough and share it as well.

Homemade Halloween Costumes for Kids: Custom T-Shirt

I recently posted up an article on making homemade Halloween costumes for kids and this is the second part to that article.  So my youngest is set with her Mickey Pirate costume for Halloween.  The question still remained, what would my 6 year old daughter be.  She decided this year that she did not want a homemade Halloween costume but rather a store purchased one.

However, this week she changed her mind by telling me that she still wanted a homemade Halloween costume, well sort of, she wanted a homemade Halloween t-shirt … lol … then she hands me her sketch for the homemade Halloween t-shirt.  Here is a picture of her sketch.


So my job was to turn this sketch into reality.  Thankfully last year I had picked up an orange t-shirt on clearance at Michaels for $1.  Although, the only problem is the size of the t-shirt, an adult size small; so that meant I would have to re-size the t-shirt to fit her.  So here are the tools I used:  my computer, Cricut Create, a Cricut mat, Sure Cuts A Lot 2 software, a brayer, Steam-A-Seam 2, Fray Check, one orange t-shirt and black fabric.

Once we settled on the design for the “Halloween Cat Witch” t-shirt, I did a test cut using paper to see how it looked and fit on the t-shirt.  I then placed the Steam-A-Seam onto the black fabric and the used the Cricut Create and Sure Cuts A Lot software to cut the images out.


I then ironed the images onto the t-shirt.  I applied the Fray Check to the cut out so that the design will not fray when washed.  Here is what it looked like as the adult size small.

The next step was to re-size the t-shirt.  Basically it involved taking the t-shirt apart and cutting away the excess fabric and sewing it together again.

The final result is one homemade Halloween kids t-shirt, the “Halloween Cat Witch”.  I’m so proud of her for designing it.