DIY (Do It Yourself) Ring Light

I have wanted a ring light for a while but I can’t justify paying the price. I looked online and found a ton of videos on how to make your own ring light. I found a couple of videos that said you could make it for under $25, so I watched those and made notes.

Here are the items for the project:
Wire Wreath Frame
LED Lights
Cardboard (size should be larger than the wreath)
Aluminum Foil
Wax paper
Zip Ties
Tape

I picked up a 16-inch wire wreath frame from Hobby Lobby. I paid $1.79 with a coupon. You can find these in the floral supply area of Walmart, Michaels and JoAnn Fabrics. I would not recommend using a wreath frame smaller than 16-inch.  Beauty Tips for Women 734

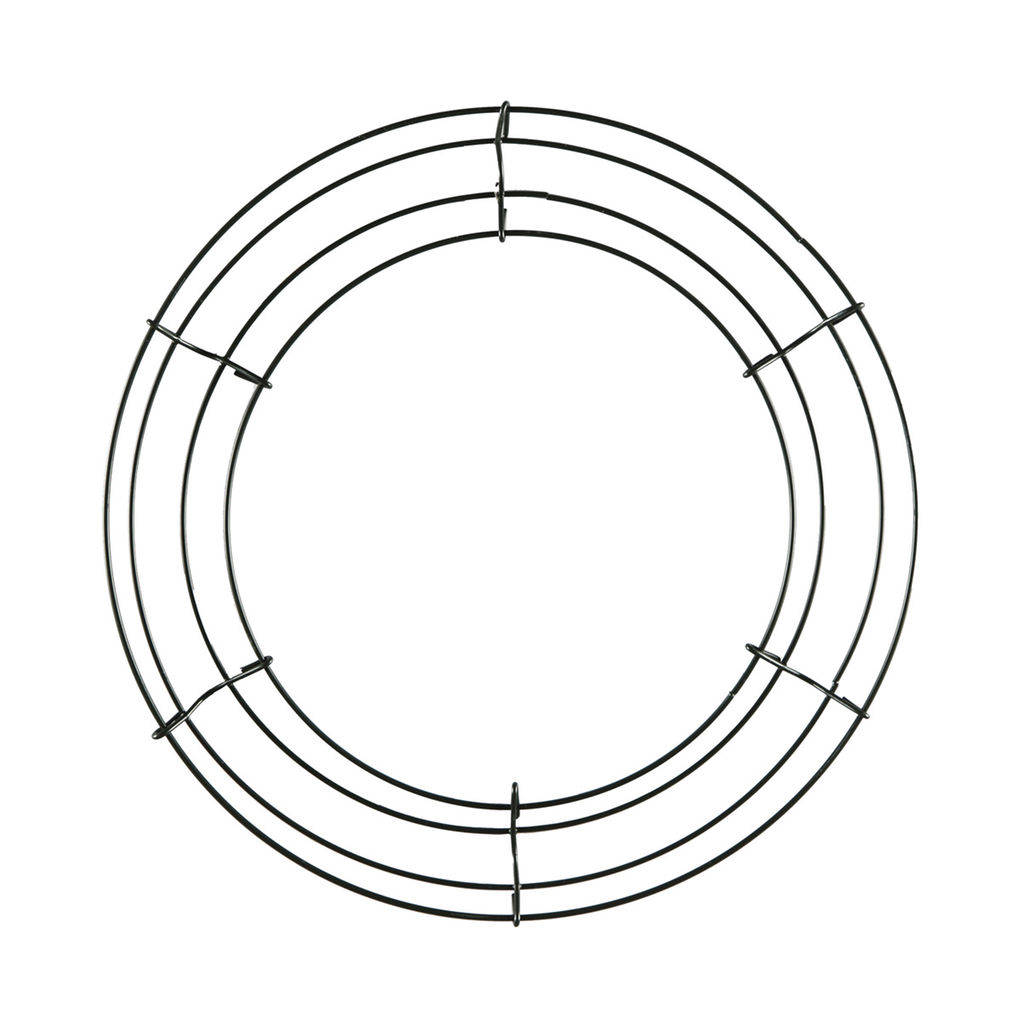
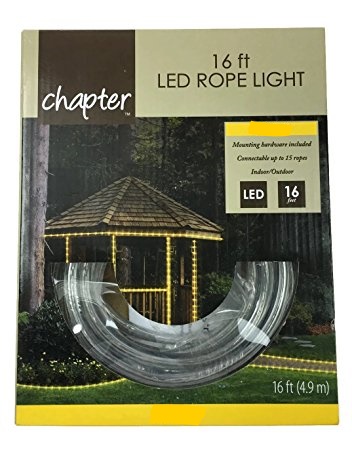
For the LED lights, I went to Walmart and purchased Chapter 16-inch LED Rope Light (Day Light), cost $12.84. I would recommend getting Day Light over the other kinds available, ex: soft light.

Beauty Tips for Women 735

Wax paper, I picked up at Walmart for $1.43.

I didn’t need to purchase Aluminum Foil, Tape, Cardboard, and Zip Ties because I already had them.

Before I started the construction process, I considered the problem most people have after making the ring light which is attaching it to a tripod. Looking around the garage I found this metal loop thing, I don’t know what it is called. I thought I could make some kind of handle with it.

Beauty Tips for Women 736

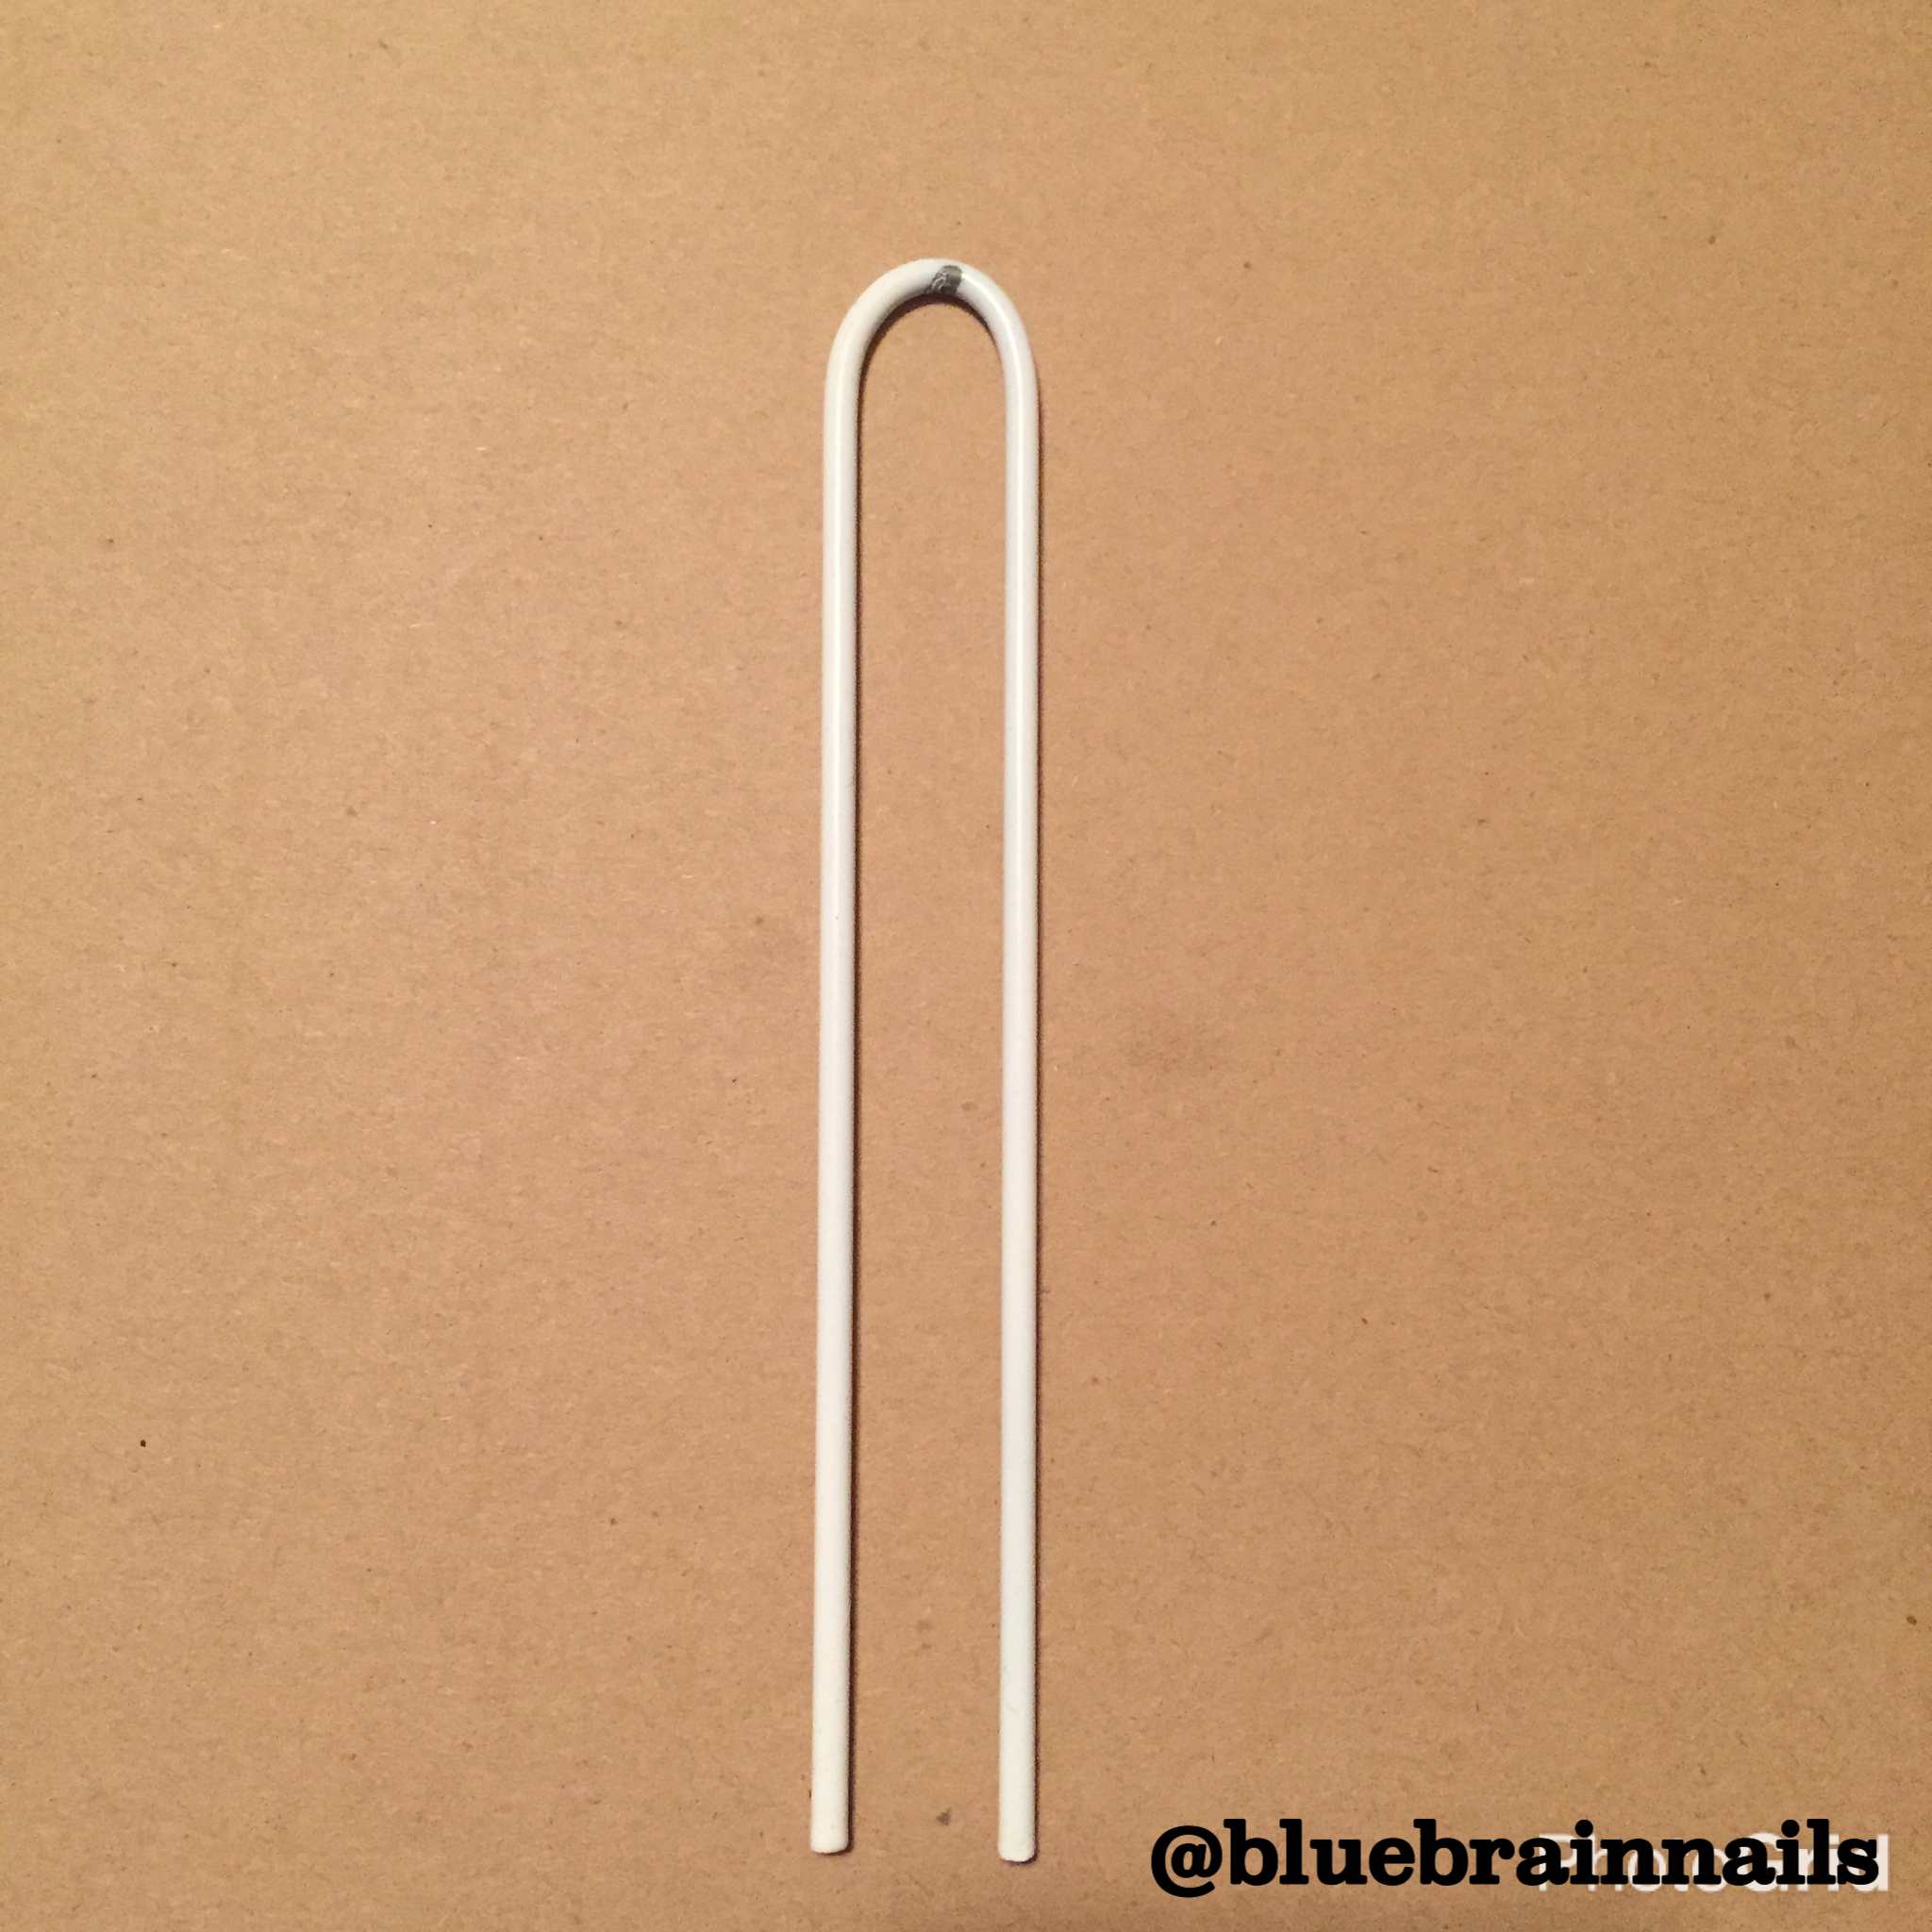
I was able to get it in between the frame and secured it with the zip ties. With this makeshift handle, I’m able to attach it to my tripod using a clamp. You can find clamps at Home Depot for a $1.

Beauty Tips for Women 737

Construction:
1. Make an outline of the wreath on the cardboard. This will be used as the backing for the wreath.
2. Cut it out.
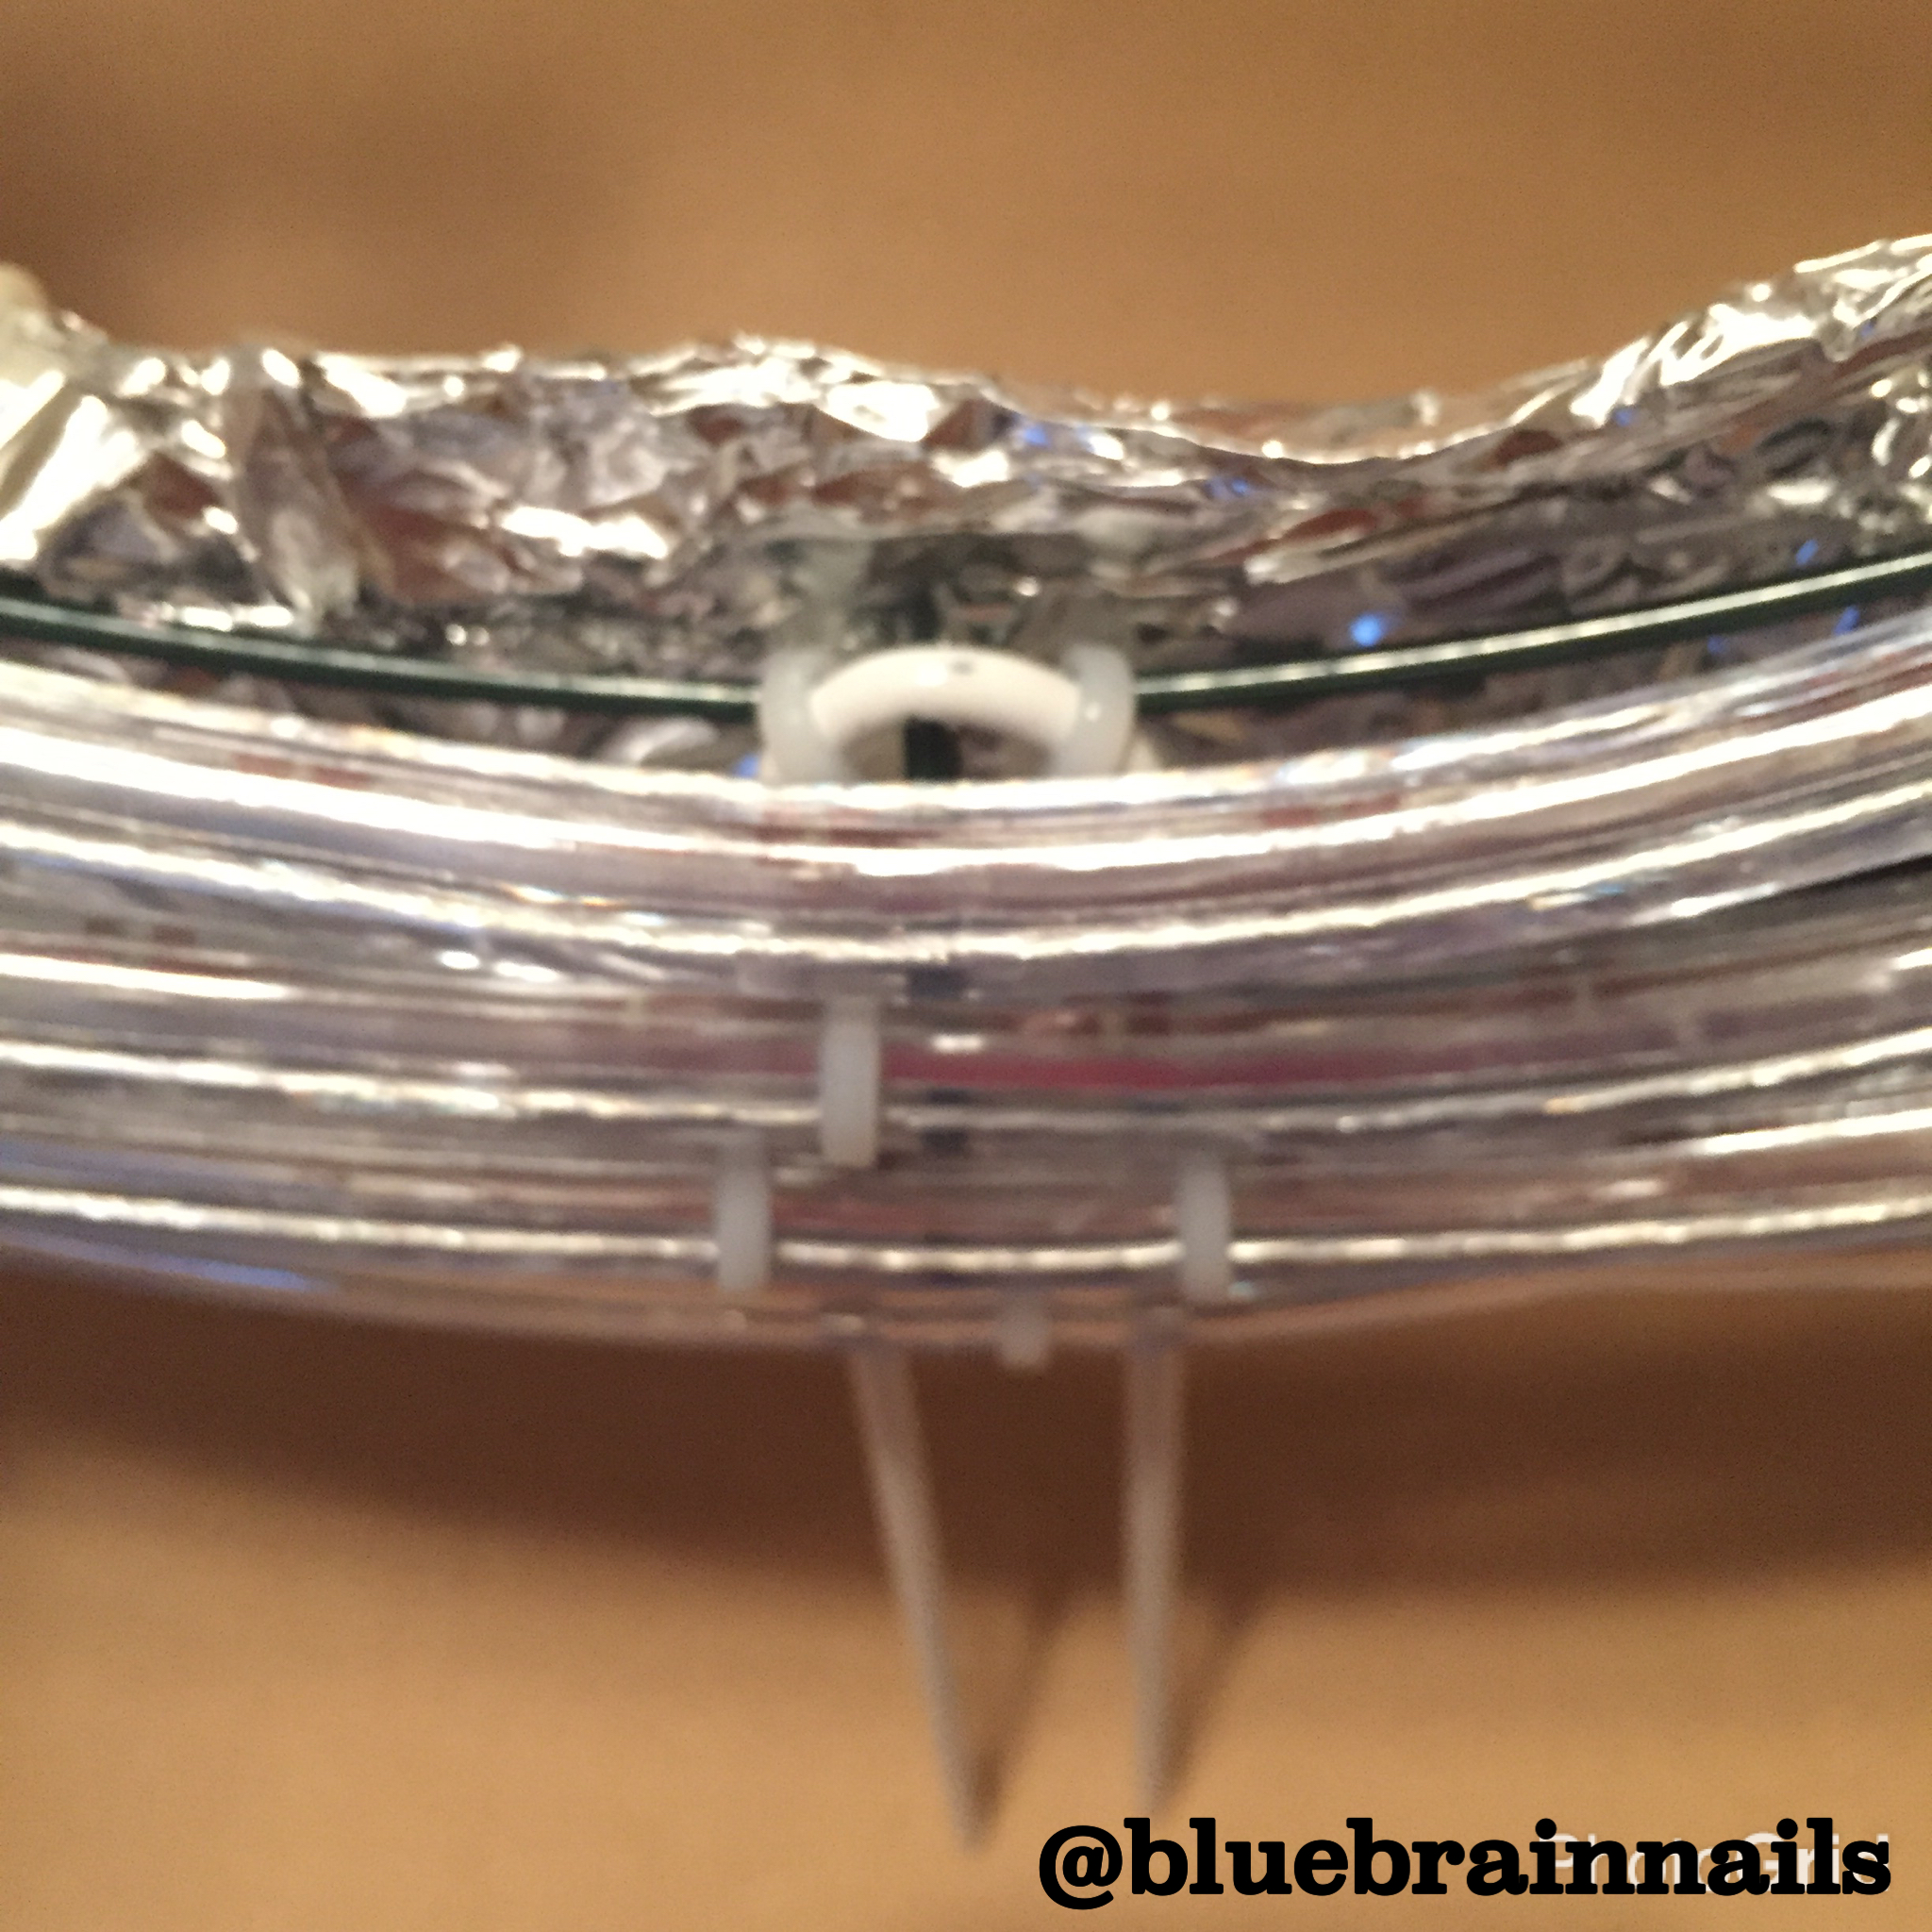
3. Take the foil and wrap it around the cardboard cutout. This will help the light reflect              more.
4. The wreath needs to be facing outward. So the lights pop out when wrapped.
5. If you have made a handle you will need to figure out where at the top to start to attach       the lights so the plug will end close to your handle.
6. Attach your lights with the zip ties starting on the outer rim working your way in. When       you reach the plug, secure it to the back of wreath so it won’t be visible from the front.
7. Cut all the excess off the zip ties. I ended up using a nail file to file the zip ties after             cutting them because they were sharp.
8. Attach the wreath to the cardboard using the zip ties.
9. Take the wax paper and wrap it all around and secure that with tape. The wax paper            acts like a diffusion cloth.

I skipped doing #9 because I have such poor lighting in my place. I might change my mind and add it later. So you decided whether or not you need this step.  Beauty Tips for Women 738

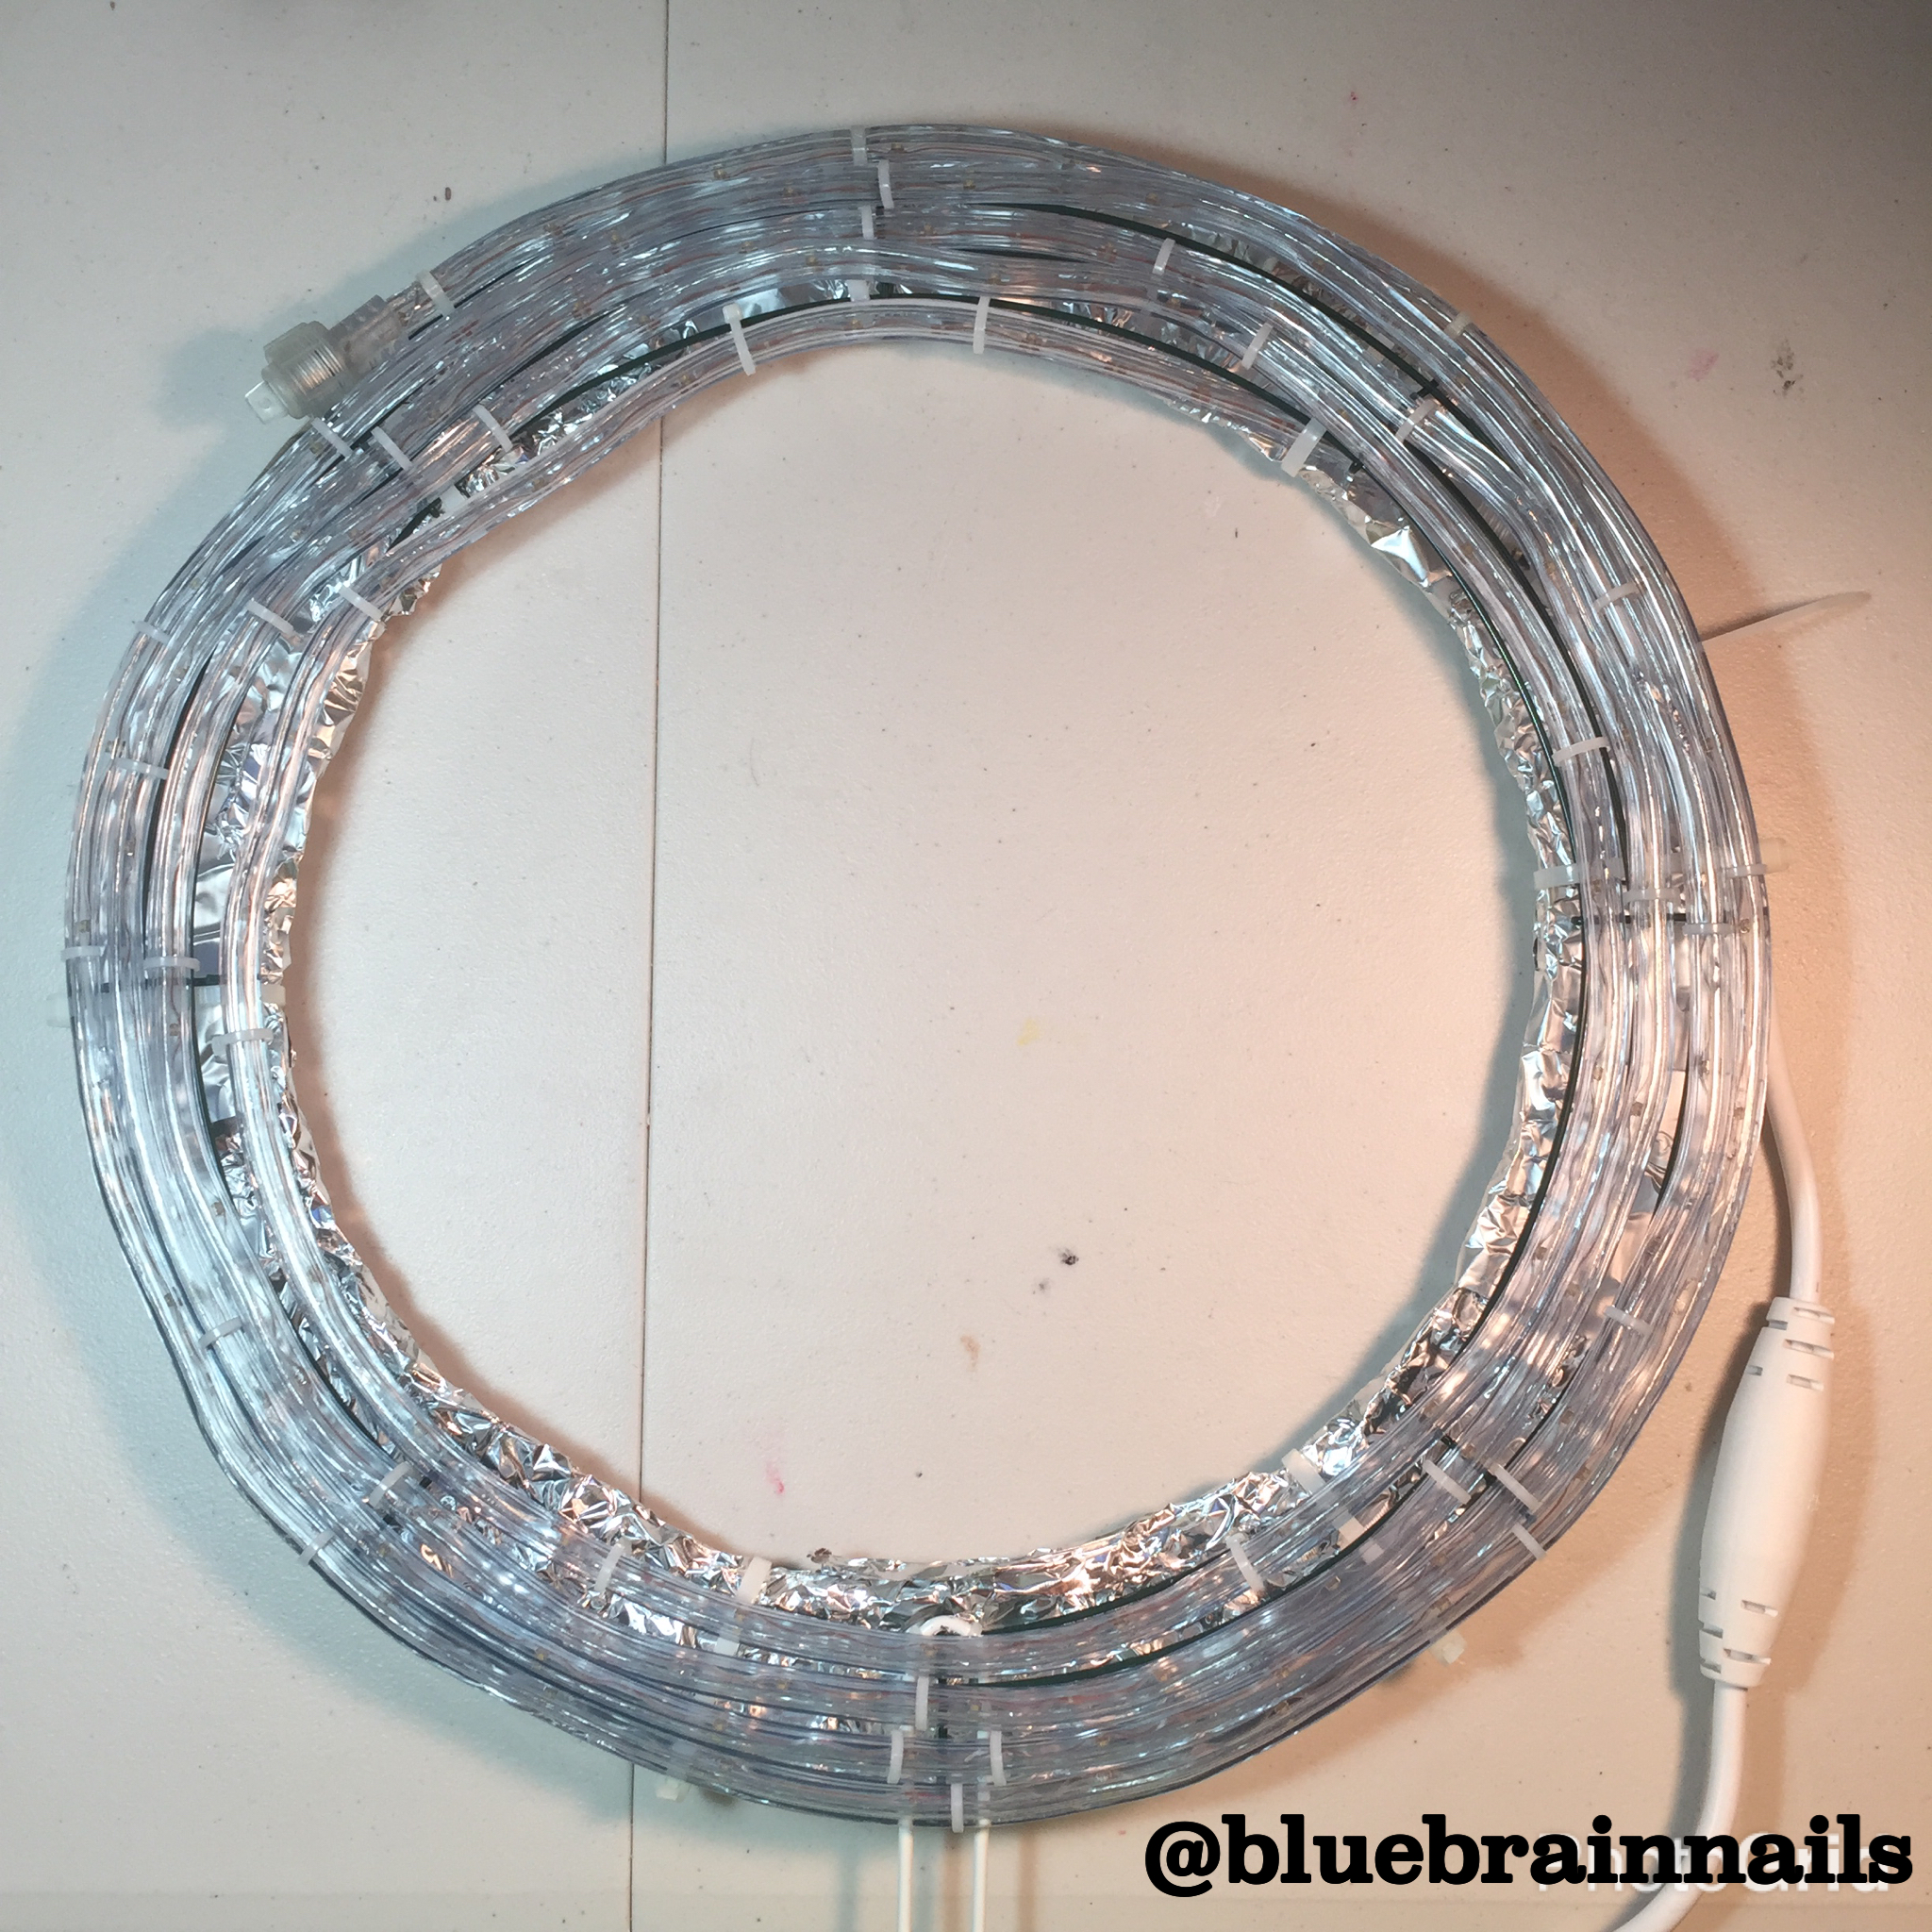
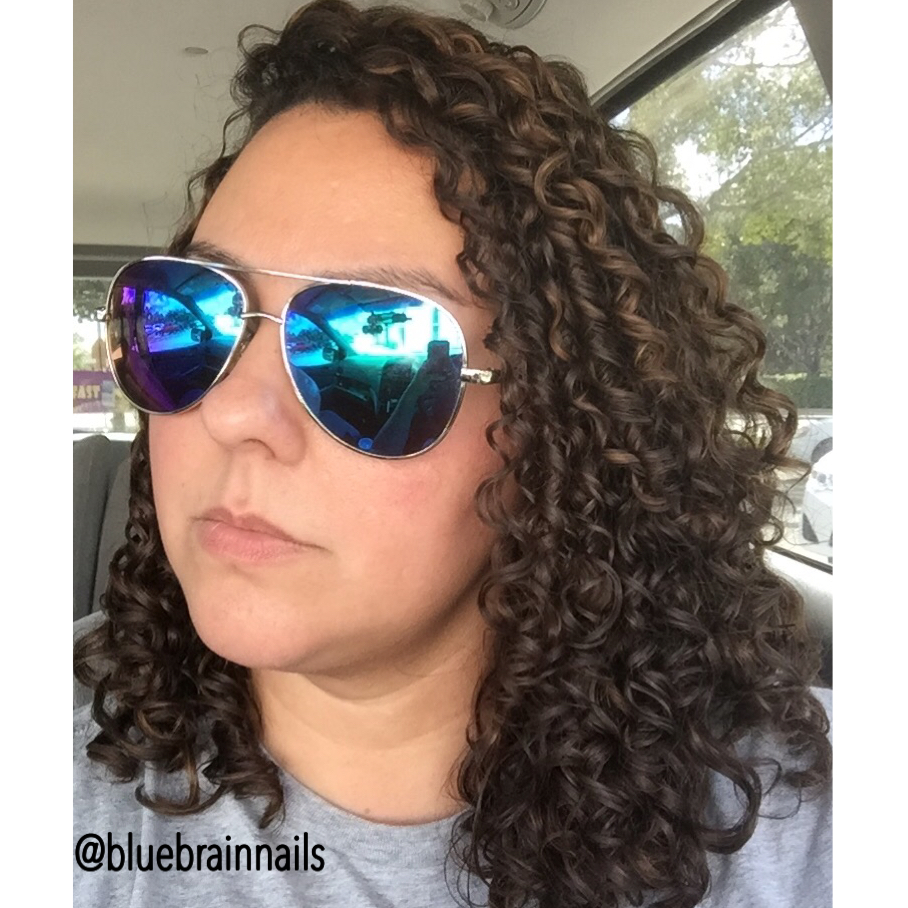
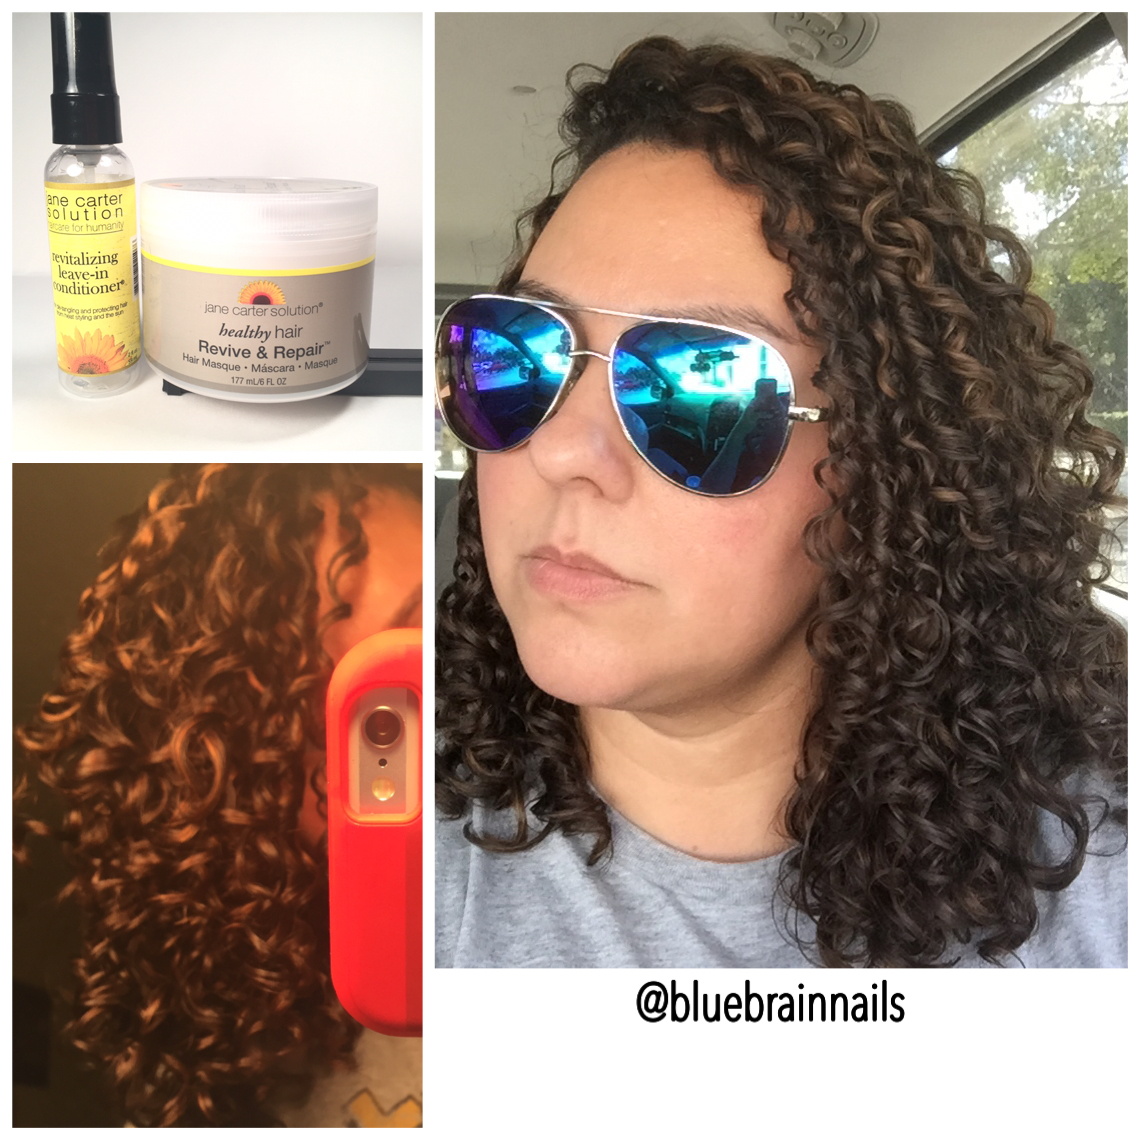
My total for this project came out to $16.06. The results using the DIY ring light are impressive. I’m really happy on how it came out.    Beauty Tips for Women 740

Shea Moisture Superfruit Complex Hair Masque and Curl Cream Review

I purchased two products from the Shea Moisture Superfruit Complex line, 10-in-1 Renewal System Hair Masque and Multi-Vitamin Soft Curl Cream. The line is designed for wavy, curly hair.

I started off by washing my hair with Shea Moisture African Water Mint & Ginger Detox & Refresh Hair & Scalp Gentle Shampoo. I squeezed out as much water out of my hair but I don’t use a towel. I applied the 10-in-1 Renewal System Hair Masque. The masque is thick and smells great. I left the masque on for 30 minutes and used a heating cap. After rinsing out the masque, my hair felt super soft.

To style, I used the Multi-Vitamin Soft Curl Cream. I cream had a nice consistency, not too thick and not runny. The smell was great. I was able to detangle my hair with no problem. I made sure not to apply any to my roots as my hair easily gets weighed down. I scrunched the product for a while. I followed up by scrunching Curl Keeper Original to my ends. I let my hair air dry and once dry, I broke the cast.   Beauty Tips for Women 733

I’m certainly impressed with these two products from the Superfruit Complex line. I loved the results. The masque was very hydrating. As for the gel-cream, I got great curl definition and hold. I certainly will be adding these two to my hair care routine.

Review: Jane Carter Solution Revive & Repair Hair Masque

My only experience with Jane Carter Solution is using their Revitalizing Leave-in Conditioner to refresh my curls. The Revitalizing Leave-in is great. I was in need of a treatment so I decided I would try their hair masque. I purchased the Jane Carter Solution Revive & Repair Hair Masque.

beauty-tips-for-women-711

I started off by washing my hair with Shea Moisture African Water Mint & Ginger Detox & Refresh Hair & Scalp Gentle Shampoo. With my hair wet, I applied the masque in sections to my hair. The masque is thick and creamy with a pleasant smell. The slip is amazing. I left it on for 20 minutes and used a heating cap. My hair felt super soft when I rinsed it out. To style my hair I used the Revitalizing Leave-in. I didn’t use anything else because I wanted to see what would happen.

beauty-tips-for-women-712 beauty-tips-for-women-713(Lighting is always an issue) beauty-tips-for-women-714

Really pleased with the results. The Revive & Repair Hair Masque delivered on its claims. This is definitely a holy grail product for me.  beauty-tips-for-women-715